Author Archive vella

Byvella

free christmas list printable pdf

Discover the joy of organization with free Christmas list printables! These PDF templates help you create wish lists‚ gift lists‚ and more‚ making holiday planning effortless and fun.

What Are Free Christmas List Printables?

Free Christmas list printables are downloadable templates designed to help you organize and manage various holiday-related tasks. These PDF files are available online at no cost and can be easily printed at home. They cater to both kids and adults‚ offering a variety of designs and formats to suit different needs. Whether you’re creating a wish list‚ a gift list‚ or a to-do list for holiday preparations‚ these printables provide a convenient and festive way to stay organized. Many templates are customizable‚ allowing you to personalize them with names‚ items‚ or special messages. They also come in standard sizes‚ such as US letter or A4‚ ensuring compatibility with most home printers. By using these printables‚ you can streamline your holiday planning and add a touch of fun to your preparations.

Why Use Printable Christmas Lists?

Printable Christmas lists are a fantastic way to stay organized and stress-free during the holiday season. They provide a structured format for creating wish lists‚ gift lists‚ and to-do lists‚ helping you keep track of everything from presents to holiday tasks. These templates are not only practical but also add a touch of festive fun to your planning. By using printable lists‚ you can ensure that no details are overlooked‚ whether it’s gifts for loved ones‚ meal preparations‚ or holiday activities. Additionally‚ they offer a cost-effective solution‚ as they are free to download and print‚ saving you money on stationery. Many designs are customizable‚ allowing you to personalize them to suit your needs. Overall‚ printable Christmas lists make holiday planning easier‚ more enjoyable‚ and stress-free‚ helping you focus on what truly matters during this special time of year.

Benefits of Using Free Christmas List Printables

Free Christmas list printables offer a simple‚ cost-effective way to stay organized and enhance the festive spirit. They help you plan gifts‚ track budgets‚ and share wishes effortlessly.

Improved Organization

Free Christmas list printables are an excellent tool for staying organized during the holiday season. They allow you to create detailed wish lists‚ gift lists‚ and to-do lists‚ ensuring nothing is overlooked. With these templates‚ you can easily track gifts for family and friends‚ plan holiday meals‚ and manage decorations. The structured format helps prioritize tasks and deadlines‚ reducing stress and saving time. Whether it’s a wish list for kids or a budget tracker for adults‚ these printables keep all your plans in one place. By using them‚ you can avoid last-minute rushes and ensure a smooth‚ enjoyable holiday experience. They are especially useful for families with multiple tasks to juggle‚ helping everyone stay on the same page.

Enhanced Festive Spirit

Free Christmas list printables add a touch of holiday cheer to your planning process. With festive designs‚ vibrant colors‚ and themes like snowflakes‚ Santa Claus‚ and reindeer‚ these templates bring joy to creating wish lists‚ gift lists‚ and to-do lists. They allow kids to express their excitement by filling out colorful wish lists‚ while adults can enjoy the nostalgic charm of beautifully designed templates. Many printables feature adorable illustrations and holiday motifs‚ making the task of list-making a delightful part of the season. By incorporating these festive elements‚ free Christmas list printables help build anticipation and make the holiday experience even more special. They also provide a fun way to involve the whole family in holiday preparations‚ creating lasting memories along the way.

Cost-Effective Solution

Free Christmas list printables offer a budget-friendly way to stay organized during the holiday season. These templates are available at no cost‚ eliminating the need to purchase expensive stationery or planning tools. With a wide variety of designs to choose from‚ you can find the perfect printable to suit your needs without spending a dime. Many websites provide high-quality‚ downloadable PDFs that are compatible with both US letter and A4 paper sizes‚ ensuring versatility. This cost-effective solution allows you to allocate your holiday budget to more important things‚ like gifts or decorations‚ while still maintaining a festive and organized approach to your planning. By using free printables‚ you can enjoy the benefits of a well-structured holiday season without any financial strain.

Types of Christmas Lists Available for Download

Explore a variety of free Christmas list printables‚ including wish lists for kids‚ gift lists for adults‚ and combined wish and gift lists in PDF format.

Wish Lists for Kids

Make the holiday season magical for your little ones with free printable Christmas wish lists designed specifically for kids. These charming templates feature festive designs‚ colorful illustrations‚ and fun layouts that spark excitement. Available in PDF format‚ they are easy to download and print‚ allowing children to jot down their heart’s desires for Santa. Many designs include space for kids to write their name‚ age‚ and wishes‚ making it a personalized and memorable experience. Some templates even offer sections for drawing or adding stickers‚ encouraging creativity. Parents can use these lists to keep track of their child’s wishes‚ ensuring a joyful and stress-free holiday season. With various styles to choose from‚ every child can find a wish list that matches their personality‚ making the countdown to Christmas even more special and engaging for the whole family.

Gift Lists for Adults

Streamline your holiday shopping with free printable Christmas gift lists tailored for adults. These practical templates help you keep track of everyone on your gift-giving list‚ ensuring no one is forgotten. Available in PDF format‚ they offer space to note gift ideas‚ budgets‚ and purchase status‚ making it easier to stay organized. Many designs include columns for prioritizing gifts or tracking expenditures‚ helping you manage your holiday spending efficiently. With elegant and modern layouts‚ these printables are perfect for adults who want to maintain a polished and organized approach to gift-giving. Whether you’re shopping for family‚ friends‚ or coworkers‚ these lists provide a structured way to plan and execute your holiday gifts seamlessly. They’re a thoughtful and functional tool to simplify the busy holiday season.

Combined Wish and Gift Lists

Combine your holiday planning with free printable Christmas combined wish and gift lists. These versatile templates allow you to create a single document for both wishes and gifts‚ helping you stay organized and ensure everyone’s needs are met. Perfect for families or individuals managing multiple lists‚ these PDF printables often include sections for gift ideas‚ budget tracking‚ and checkboxes to mark off completed purchases. They’re designed to simplify the process of matching wishes with gifts‚ reducing stress and saving time. Many templates feature festive designs‚ adding a touch of holiday cheer to your planning. Whether for kids or adults‚ these combined lists are a practical solution for keeping track of everything in one place‚ ensuring a seamless and enjoyable holiday experience for all. They’re a great way to streamline your holiday preparations and keep everything organized.

To-Do Lists for Holiday Preparation

Stay on top of your holiday tasks with free printable Christmas to-do lists. These templates are designed to help you manage every aspect of holiday preparation‚ from decorating and cooking to gift wrapping and event planning. With checkboxes and organized sections‚ you can easily track your progress and ensure nothing is forgotten. Many PDF printables include space for noting deadlines‚ assigning tasks to family members‚ and adding last-minute reminders. They’re perfect for keeping your holiday season stress-free and organized. Festive designs add a cheerful touch‚ making your planning process more enjoyable. Whether you’re hosting a large gathering or celebrating quietly at home‚ these lists help you stay focused and ensure a smooth‚ joyful holiday experience. Customize them to fit your needs and make the most of your holiday preparation.

Budget Trackers

Manage your holiday expenses efficiently with free printable Christmas budget trackers. These templates help you monitor spending‚ allocate funds‚ and stick to your budget. Designed to be user-friendly‚ they often include sections for income‚ expenses‚ and savings. Many PDF printables allow you to categorize purchases‚ such as gifts‚ decorations‚ and meals‚ ensuring no area of your holiday spending is overlooked. Budget trackers also help you prioritize expenses and avoid overspending. With festive designs and customizable fields‚ they make budgeting feel less daunting and more enjoyable. By using these tools‚ you can enjoy a financially stress-free holiday season while still creating memorable celebrations. They’re a practical addition to your holiday planning toolkit‚ helping you stay organized and financially prepared for Christmas.

Design and Customization

Elevate your holiday planning with festive designs and customizable Christmas list printables. Choose from various themes‚ colors‚ and layouts to match your personal style and holiday spirit perfectly. Many PDF templates allow you to add names‚ wishes‚ or notes‚ making them uniquely yours. From vintage-inspired designs to modern‚ minimalist styles‚ there’s something for everyone. Some printables even offer editable fields‚ enabling you to tailor the content before printing. With such versatility‚ these templates ensure your Christmas lists are both functional and visually appealing. Customize them to reflect your personality and make the season even more special. This feature makes free Christmas list printables a delightful and practical holiday tool.

How to Choose the Right Design for Your Needs

Choosing the right design for your Christmas list printable involves considering who will use it and its purpose. For kids‚ opt for fun‚ colorful templates with festive imagery like snowmen or Santa Claus. Adults might prefer sleek‚ minimalist designs or elegant layouts. Think about the list’s function—whether it’s for wish lists‚ gift tracking‚ or budget planning. Some PDFs are specifically tailored for these purposes‚ so select designs that match your needs. Consider the style that aligns with your holiday decor or personal preferences. Many templates offer customizable fields‚ allowing you to add names or categories. If you want something unique‚ look for printables with editable text or fillable forms. Ensure the design is easy to read and practical for your use case. By selecting a design that fits your lifestyle and preferences‚ you’ll make holiday planning more enjoyable and efficient. This ensures your Christmas list is both functional and visually appealing.

How to Customize Printable PDFs

Customizing Christmas list printables is a breeze with the right tools. Many PDF templates are designed to be editable‚ allowing you to add names‚ wishes‚ or categories before printing. Use software like Adobe Reader or online editors to type directly into the fields. For non-editable templates‚ you can handwrite your details after printing. Choose designs with festive fonts or holiday-themed borders to match your style. Some templates offer fillable forms‚ making it easy to personalize gifts or wish lists. You can also add photos or stickers for a personal touch. Ensure the text is legible and the layout fits your needs. By tailoring the printable to your preferences‚ you create a unique and functional tool for holiday planning. This customization makes the process enjoyable and ensures your list stands out.

Sources to Download Free Christmas List Printables

Find free Christmas list printables on websites like PrintablesFree.Org‚ offering a variety of templates. Pinterest and other platforms also provide festive designs for download easily.

Popular Websites Offering Free Printables

Several websites provide an extensive collection of free Christmas list printables for various purposes. PrintablesFree.Org offers 18 free PDFs for wish lists‚ to-do lists‚ and gift lists‚ all in standard US letter size. Meanwhile‚ Monday Mandala features festive designs to keep your holiday planning organized and stress-free. Pinterest is another great resource‚ offering a wide range of printable templates with customizable options. These websites cater to both kids and adults‚ ensuring everyone can participate in the festive planning. Many templates are editable‚ allowing users to personalize their lists before printing. Whether you’re creating a wish list‚ gift tracker‚ or letter to Santa‚ these platforms provide everything you need to stay organized and enjoy the holiday spirit.

Social Media Platforms for Holiday Printables

Social media platforms are a treasure trove for finding free Christmas list printables. Pinterest stands out as a top destination‚ offering a vast collection of customizable templates and ideas. Users can search for keywords like “Christmas wish list free printable” to discover hundreds of designs. Many creators share their festive templates on Pinterest‚ making it easy to download and print. Additionally‚ Instagram and Facebook often feature holiday printables from crafty accounts and bloggers. These platforms allow users to save and share their favorite designs directly. By following holiday-themed hashtags or joining relevant groups‚ you can uncover exclusive printable Christmas lists tailored to your needs. Social media makes it simple to find‚ download‚ and enjoy high-quality templates‚ ensuring your holiday planning is both fun and organized.

How to Use Your Free Christmas List Printable

Download the PDF‚ print it on standard paper‚ and fill it out with your wishes or tasks. Use it for wish lists‚ gift lists‚ or holiday planning.

Downloading and Printing

Downloading and printing your free Christmas list printable PDF is a straightforward process. Start by visiting a reputable website offering these templates‚ such as PrintablesFree.Org or similar platforms. Once you’ve selected your preferred design‚ click the download link to save the PDF file to your device. Ensure your printer is set to the correct paper size‚ as most templates are designed for standard US letter or A4 formats. Print the list on high-quality paper for a professional finish. Some templates are fillable‚ allowing you to type directly before printing‚ while others are designed for handwriting. After printing‚ customize the list by adding your wishes‚ gift ideas‚ or tasks. These printables are versatile and can be used for wish lists‚ gift lists‚ or holiday planning‚ ensuring your Christmas preparations are organized and stress-free. Many designs feature festive themes‚ adding to the holiday spirit!

Filling Out the List

Filling out your free Christmas list printable PDF is a fun and essential step in making the most of these templates. Start by carefully reviewing the design and layout to ensure it meets your needs. For wish lists‚ write down gifts‚ hobbies‚ or experiences you’d love to receive‚ making sure to be specific. If it’s a gift list for others‚ include names‚ gift ideas‚ and budget details. Some templates allow you to type directly into the PDF‚ while others are designed for handwriting‚ giving you flexibility. Organize your entries clearly‚ using checkboxes or categories if provided. For combined wish and gift lists‚ separate sections make it easy to track both. Don’t forget to add personal touches‚ like notes or drawings‚ to make it extra special. Once complete‚ review the list to ensure accuracy and share it with family or friends as needed. This step ensures your holiday plans are clear‚ organized‚ and enjoyable for everyone involved!

Sharing the List

Once your Christmas list printable PDF is complete‚ sharing it with family and friends is a breeze. You can easily email the PDF file or share it via messaging apps‚ ensuring everyone knows your wishes. For gift lists‚ sharing helps others choose thoughtful presents and avoid duplicates. Some templates are designed to be shared digitally‚ while others can be printed and handed out. If you’ve filled out the list electronically‚ you can attach it to an email or send it through social media. For a more personal touch‚ print the list on festive paper and share it during holiday gatherings. Sharing your Christmas list not only streamlines gift-giving but also adds to the excitement of the season. It’s a thoughtful way to communicate your preferences while spreading holiday cheer to loved ones!

Tips for Getting the Most Out of Your Christmas List

Use free Christmas list printables to organize wishes and gifts. Customize templates to fit your style‚ share lists digitally or physically‚ and involve the whole family for a fun‚ collaborative experience.

Making It a Family Activity

Involving the whole family in creating Christmas lists fosters collaboration and excitement. Parents and kids can work together to fill out free printable PDFs‚ making it a fun bonding experience. Allow children to decorate their lists with stickers or drawings‚ adding a personal touch. This activity not only organizes wishes but also teaches kids about responsibility and the joy of giving. Adults can guide younger ones‚ ensuring their lists are thoughtful and realistic. Sharing the process creates lasting holiday memories and builds anticipation for Christmas morning. By making it a family effort‚ everyone feels involved and valued‚ turning a simple task into a cherished tradition.

Using It for Budgeting

Free Christmas list printables are not just for wish lists—they can also serve as powerful tools for budgeting. By organizing your holiday expenses in one place‚ you can track spending and stay within your financial limits. Many templates include columns for budget allocation‚ allowing you to assign specific amounts to gifts‚ decorations‚ and other expenses. This helps prevent overspending and ensures a stress-free holiday season. Additionally‚ these printables enable you to prioritize purchases‚ focusing on what truly matters. You can also use them to teach children about the importance of budgeting‚ fostering financial awareness from a young age. By combining organization with fiscal responsibility‚ these lists make it easier to enjoy the holidays without breaking the bank‚ ensuring a joyful and debt-free celebration for years to come.

Why Budgeting is Important During Christmas

Budgeting during Christmas helps avoid overspending and financial stress‚ ensuring a joyful celebration without debt. It also teaches kids about responsible spending‚ fostering a debt-free holiday spirit.

Avoiding Overspending

Using free Christmas list printables is an excellent way to avoid overspending during the holiday season. These templates help you set clear limits on gifts‚ decorations‚ and other expenses‚ ensuring you stick to your budget. By organizing your spending in advance‚ you can prioritize what’s truly important and avoid impulse purchases. Many printables include sections for budget tracking‚ allowing you to monitor expenses in real-time. This helps prevent financial strain and keeps the focus on the joy of giving rather than excessive spending. Additionally‚ these lists encourage thoughtful gift-giving‚ reducing the pressure to overspend on unnecessary items. With a clear plan in place‚ you can enjoy a festive and memorable Christmas without the stress of debt or financial overwhelm.

Teaching Kids About Budgeting

Free Christmas list printables are a great tool for teaching kids about budgeting during the holiday season. By involving them in the process of creating wish lists and tracking expenses‚ you can help them understand the value of money and the importance of prioritizing. Many printable templates include sections for categorizing wants and needs‚ allowing kids to learn how to make thoughtful decisions. You can also use these lists to explain how to allocate a set budget‚ helping them grasp the concept of financial limits. This hands-on approach not only makes learning fun but also fosters responsibility and awareness. Encouraging kids to participate in budgeting early on can set the foundation for healthy financial habits in the future. Make it a family activity to ensure they understand the true spirit of giving while staying within means;

Specialized Christmas Lists

Free Christmas list printables include letters to Santa‚ holiday grocery lists‚ and more‚ offering a personal touch to your festive preparations and ensuring every detail is covered for a memorable celebration.
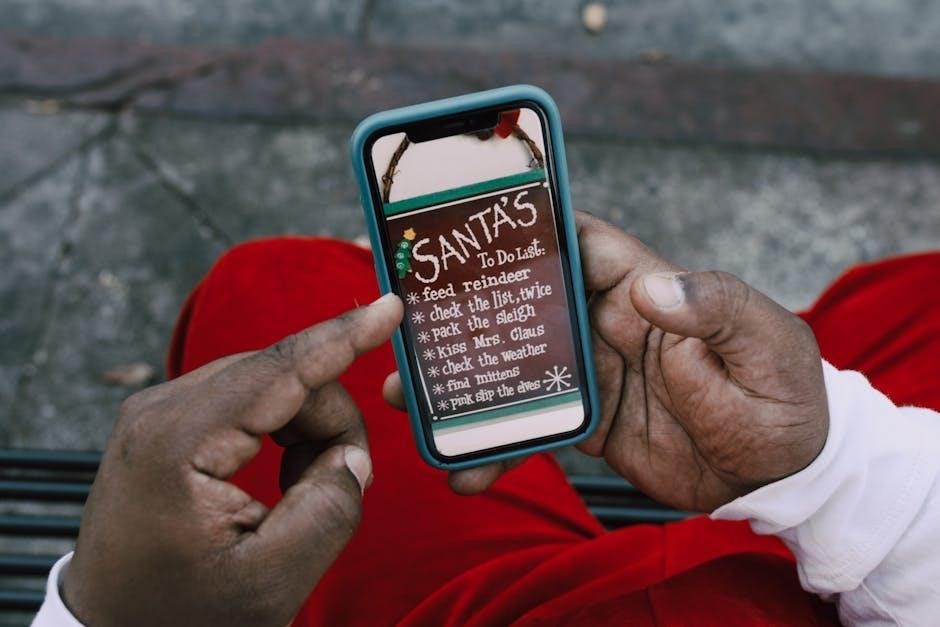
Letters to Santa

Free Christmas list printables include charming letters to Santa templates‚ allowing kids to express their wishes creatively. These PDFs are customizable‚ featuring festive designs‚ from cute illustrations to vintage styles. Parents can help children fill them out‚ making it a fun family activity. Many templates offer space for wishes‚ drawings‚ and personal messages‚ capturing the magic of the season. Downloading and printing these letters is easy‚ and they can be paired with envelopes for a realistic touch. Some designs are fillable‚ saving time and ensuring neatness. These printables are perfect for including with gifts or decorating the Christmas tree. They also serve as heartfelt keepsakes‚ preserving childhood memories. With various styles available‚ every child can find a template that matches their personality‚ making the experience even more special and enjoyable.

Holiday Grocery Lists

Free Christmas list printables also include holiday grocery lists to streamline your festive meal planning. These PDF templates are designed to help you organize ingredients‚ track recipes‚ and ensure nothing is missed. With customizable fields‚ you can categorize items like appetizers‚ main courses‚ desserts‚ and beverages. Many templates also include sections for noting quantities and checking off items as you shop. This makes grocery shopping efficient and stress-free‚ especially during the busy holiday season. Some designs even offer space for budget tracking or meal planning for multiple days. Downloading and printing these lists ensures your Christmas feast is perfectly prepared. They’re a practical tool for hosts and home cooks‚ helping to create a memorable and delicious holiday experience for family and friends.

Byvella

breckwell big e owners manual

Welcome to the Breckwell Big E Owner’s Manual! This guide provides essential information for safe and efficient operation of your pellet stove. Inside, you’ll find detailed instructions on installation, maintenance, and troubleshooting. Designed for performance and durability, the Big E offers reliable heat with user-friendly controls. Read this manual carefully to ensure optimal use and longevity of your stove.

Safety Precautions

Always follow safety guidelines to ensure safe operation of your Breckwell Big E pellet stove. Improper installation or misuse can lead to house fires or injuries. Keep flammable materials away and ensure proper ventilation. Follow all instructions in this manual carefully. Failure to comply may result in property damage or personal harm. Grounding is required for safe operation.

2.1 Importance of Safety

Safety is paramount when operating the Breckwell Big E pellet stove. Proper installation, maintenance, and usage are critical to preventing hazards such as house fires or personal injury. The guidelines outlined in this manual are designed to ensure the stove functions safely and efficiently. Failure to follow these instructions can lead to dangerous situations, including carbon monoxide poisoning or electrical hazards. Always prioritize safety to protect yourself, your family, and your property.

The Breckwell Big E is equipped with advanced safety features, but proper user adherence to safety protocols is essential. This includes keeping flammable materials away from the stove, ensuring proper ventilation, and avoiding modifications to the unit. Regular inspections of components like venting systems and electrical connections are also vital. Grounding the stove correctly is a critical safety measure to prevent electrical issues.

By adhering to the safety precautions in this manual, you can enjoy the benefits of your pellet stove while minimizing risks. Remember, safety is a shared responsibility between the manufacturer and the user. Take the time to understand and follow all recommendations to ensure a safe and enjoyable experience with your Breckwell Big E.

  • Always keep flammable materials away from the stove.
  • Ensure proper ventilation to avoid carbon monoxide buildup.
  • Regularly inspect and maintain the stove and its components.
  • Follow all installation and grounding instructions carefully.

Stay vigilant and proactive in maintaining a safe environment for your pellet stove to operate effectively.

2.2 Warning Labels and Symbols

Your Breckwell Big E pellet stove is equipped with warning labels and symbols to alert you to potential hazards and ensure safe operation. These labels are strategically placed to draw attention to critical safety information. It is essential to familiarize yourself with their meanings and take the indicated precautions seriously.

Common warning labels include those related to high temperatures, electrical components, and proper installation. Symbols such as a fire hazard warning or electrical shock alert are designed to grab your attention and prevent dangerous situations. Ignoring these warnings can lead to serious consequences, including property damage, injury, or even loss of life.

The manual emphasizes that failure to follow safety instructions can result in a house fire or other hazards. Specific warnings include proper installation requirements, avoiding improper modifications, and ensuring the stove is grounded correctly. Grounding the stove with an 8-gauge copper wire and a serrated washer is a critical safety measure to prevent electrical issues.

Always read and adhere to the warnings provided in this manual and on the appliance itself. If you notice any damage to warning labels or symbols, contact a qualified technician immediately. Your safety and the safe operation of the Breckwell Big E depend on your attention to these important details.

  • High-temperature warnings indicate surfaces that can cause burns.
  • Electrical warnings alert you to components that require special handling.
  • Proper installation warnings ensure the stove operates safely and efficiently.

Heed all warnings to ensure a safe and trouble-free experience with your Breckwell Big E pellet stove.

2.3 Precautions Before Use

Before operating your Breckwell Big E pellet stove, it is crucial to take several precautions to ensure safe and efficient performance. First, verify that the stove is properly installed by a qualified technician, as improper installation can lead to serious safety hazards, including house fires. Always follow the installation guidelines outlined in this manual.

Inspect the stove for any damage or wear before initial use. Check for intact gaskets, secure electrical connections, and proper venting. Ensure the stove is grounded correctly using an 8-gauge copper wire and a serrated washer to penetrate paint or protective coatings. This step is vital to prevent electrical hazards.

Never operate the stove if any components are damaged or malfunctioning. This includes the auger motor, heat exchanger, or combustion blower. Regularly inspect the heat exchange tubes and clean them every two to three days using the built-in cleaner to maintain efficiency and safety.

Ensure proper ventilation in the room where the stove is installed. Inadequate ventilation can lead to carbon monoxide buildup, posing a significant health risk. Always use the correct type of pellet fuel, as specified in this manual, to avoid combustion issues and maintain optimal performance.

Before each use, check the ash drawer and remove accumulated ash to ensure proper airflow. Keep flammable materials, such as curtains or furniture, at least 3 feet away from the stove. Never leave children or pets unattended near the stove, as the exterior can become extremely hot during operation.

Finally, familiarize yourself with the stove’s controls and safety features, such as the automatic ignition and diagnostic systems. If you notice any unusual odors, sounds, or performance issues, shut off the stove and contact a certified technician immediately.

By following these precautions, you can enjoy safe and efficient heating with your Breckwell Big E pellet stove.

Installation Requirements

Proper installation is critical for safe and efficient operation of your Breckwell Big E pellet stove. Ensure the stove is installed by a qualified technician, adhering to local building codes and manufacturer guidelines. Maintain required clearances from combustible materials and use approved venting materials. The stove must be grounded using 8-gauge copper wire and properly connected to a 120V electrical supply. Follow all venting and clearance specifications outlined in this manual to ensure optimal performance and safety.

3.1 Pre-Installation Checklist

Before installing your Breckwell Big E pellet stove, ensure the following steps are completed to guarantee a safe and efficient setup:

  • Location Preparation: Choose a suitable location for the stove, ensuring it is away from flammable materials and meets the minimum clearance requirements (refer to the manual for specific distances).
  • VENTING SYSTEM: Verify that the venting materials meet local building codes and manufacturer specifications. Use approved PL-Vent or equivalent venting components.
  • ELECTRICAL CONNECTION: Ensure a 120V electrical supply is available near the installation site. The stove must be grounded using an 8-gauge copper wire.
  • COMPONENT INSPECTION: Check the packaging for all included components, such as the stove, venting kit, and installation hardware. Report any missing or damaged parts to the supplier.
  • FOUNDATION REQUIREMENTS: Ensure the installation surface is level, sturdy, and capable of supporting the stove’s weight. If installing on a combustible floor, use a heat-resistant barrier.
  • LOCAL REGULATIONS: Familiarize yourself with local building codes and regulations. Obtain any necessary permits before starting the installation.
  • MANUFACTURER GUIDELINES: Review the manufacturer’s installation instructions thoroughly. Adhere to all safety and technical recommendations.
  • FINAL INSPECTION: Conduct a final check of the installation site to ensure all safety and installation criteria are met before proceeding.

Failure to follow this checklist may result in unsafe operating conditions or void the warranty. Always consult a qualified installer if you are unsure about any aspect of the installation process.

3.2 Step-by-Step Installation Guide

Installing the Breckwell Big E pellet stove requires careful planning and adherence to safety guidelines. Follow these steps to ensure a successful installation:

  1. Prepare the Location: Choose a suitable location for the stove, ensuring it is away from flammable materials. Verify the minimum clearance requirements as specified in the manual.
  2. Assemble Venting Components: Use approved PL-Vent materials for the venting system, ensuring all connections are secure and properly sealed. Refer to the manual for specific venting requirements.
  3. Connect Electrical Supply: Ensure a 120V electrical supply is available. Ground the stove using an 8-gauge copper wire, following local electrical codes. Consider consulting a licensed electrician for this step.
  4. Inspect Components: Check the packaging for all included parts, such as the stove, venting kit, and installation hardware. Report any missing or damaged items to the supplier.
  5. Prepare the Installation Surface: Ensure the surface is level and sturdy; If installing on a combustible floor, use a heat-resistant barrier as recommended by the manufacturer.
  6. Mount the Stove: Place the stove on the prepared surface, ensuring it is level. Secure it to the floor using the provided hardware to prevent movement during operation.
  7. Connect Venting and Electrical Systems: Attach the venting system to the stove and ensure all electrical connections are secure. Double-check for any leaks or loose connections.
  8. Final Inspection and Testing: Conduct a thorough inspection of the installation to ensure all safety and technical criteria are met. Test the stove to confirm proper operation.

By following these steps and adhering to the manufacturer’s guidelines, you can safely and efficiently install your Breckwell Big E pellet stove. If you are unsure about any part of the process, consider hiring a qualified installer to ensure compliance with safety standards and local regulations.

3.3 Venting and Clearance Requirements

Proper venting and clearance are critical for safe and efficient operation of the Breckwell Big E pellet stove. Follow these guidelines to ensure compliance with safety standards and optimal performance:

  • Venting System Requirements: Use only approved PL-Vent materials with a diameter of 3 or 4 inches, as specified in the manual. Ensure all connections are secure and properly sealed to prevent leaks. The venting system must be installed according to local building codes and manufacturer recommendations.
  • Vertical and Horizontal Venting: For vertical venting, ensure the chimney is tall enough to provide adequate draft. For horizontal venting, maintain a minimum clearance of 12 inches from any combustible materials and ensure the vent terminates at least 12 inches above the roof or 3 feet from any adjacent windows or doors.
  • Clearance from Combustible Materials: Maintain the required clearances from walls, floors, and ceilings as specified in the manual. Typically, the stove must be at least 36 inches away from combustible materials unless protected by an approved heat shield.
  • Regular Inspections: Inspect the venting system regularly for damage, blockages, or corrosion. Clean the vents as needed to ensure proper airflow and combustion efficiency.
  • Local Building Codes: Always check local building codes and regulations for additional requirements. Failure to comply may result in safety hazards or non-compliance with local laws.

Proper venting and clearance are essential to prevent fire hazards and ensure the stove operates efficiently. Refer to the manual for detailed diagrams and specific measurements. If unsure, consult a qualified installer to ensure a safe and correct installation.

3.4 Grounding the Stove

Grounding the Breckwell Big E pellet stove is a critical step to ensure safe operation and prevent electrical hazards. Proper grounding protects against electrical shock and ensures the stove functions correctly. Follow these steps to ground your stove:

  • Materials Needed: Use an 8-gauge copper wire and a serrated or star washer to penetrate paint or protective coatings on the home’s steel chassis.
  • Connection to the Home’s Chassis: Attach one end of the copper wire to the stove’s grounding terminal, located on the back or bottom of the unit. Secure the other end to the steel chassis of your home, ensuring a tight connection using the serrated washer.
  • Ensure Proper Contact: Verify that the connection is free from paint, rust, or debris to maintain a reliable ground. If the home’s chassis is coated, use the serrated washer to penetrate the surface effectively.
  • Regular Inspections: Check the grounding wire and connections periodically for signs of damage, corrosion, or loosening. Make repairs immediately if any issues are found.
  • Professional Assistance: If you are unsure about any aspect of the grounding process, consult a qualified electrician or installer to ensure the job is done correctly.

Proper grounding is essential for the safe operation of the Breckwell Big E pellet stove. Failure to ground the stove can lead to electrical hazards, including shock or fire. Always follow the manufacturer’s instructions and local electrical codes when grounding your stove. If in doubt, seek professional assistance to ensure compliance and safety.

Operating the Breckwell Big E

Operating the Breckwell Big E pellet stove is straightforward and efficient. With one-touch digital controls, you can easily adjust heat settings and monitor performance. The automatic fuel feed system ensures consistent heat output, while the quiet 120 CFM blower distributes warmth evenly. Regular monitoring of fuel levels and ash drawer maintenance will optimize your stove’s performance and longevity.

4.1 Getting Started

Before operating your Breckwell Big E pellet stove, ensure it is properly installed and grounded. Begin by carefully unpacking and inspecting the stove to confirm all components are included and undamaged. Place the stove on a level, heat-resistant surface, ensuring it is at least 3 feet away from combustible materials. Connect the stove to a properly sized electrical outlet and ensure the grounding wire is securely attached to the home’s steel chassis using an 8-gauge copper wire.

Fill the hopper with high-quality pellets, ensuring they are dry and free of debris. The Big E can hold up to 120 pounds of fuel, providing up to 120 hours of continuous heat. Use the one-touch digital control board to select your desired heat setting. The Hot Rod Automatic Fire Starter will ignite the pellets quickly and safely, eliminating the need for starter gels. Once the stove is lit, allow it to run for a few minutes to ensure proper airflow and ignition.

Monitor the stove’s performance during the initial burn to ensure it is operating efficiently. Check the ash drawer and heat exchange tubes for any buildup, as these should be cleaned regularly to maintain performance. Always keep the area around the stove clear of flammable materials and supervise the stove during its first use. Refer to the manual for additional guidelines to ensure safe and optimal operation.

4.2 Heat Settings and Controls

The Breckwell Big E pellet stove offers five heat settings to customize your heating experience. These settings allow you to adjust the stove’s output to match your specific needs, ensuring efficient energy use and consistent comfort. The control board features a user-friendly interface with one-touch digital technology, making it easy to navigate and set preferences.

The stove’s automatic fuel feed system ensures a steady supply of pellets, maintaining a consistent flame and heat output. The control board includes multiple safety checks and diagnostics, which monitor the stove’s performance and alert you to any issues. This advanced system helps extend the life of your stove and ensures safe operation.

To adjust the heat settings, simply press the up or down arrows on the control board to select your desired level; The stove will automatically adjust the pellet feed rate and combustion air intake to achieve the selected heat output. The built-in blower, which circulates warm air throughout your space, operates quietly at 120 CFM, providing effective heat distribution without excessive noise.

Regularly check and clean the heat exchange tubes and ash drawer to ensure optimal performance. Proper maintenance will help preserve the efficiency and longevity of your stove, keeping your home warm and comfortable for years to come. Always refer to the manual for detailed instructions on operating and maintaining your Breckwell Big E pellet stove.

4.3 Fuel Management

Proper fuel management is crucial for optimal performance of your Breckwell Big E pellet stove. The stove is designed to burn high-quality wood pellets, which provide consistent heat and minimize maintenance. Always use dry, seasoned pellets with a low moisture content to ensure efficient combustion and reduce the risk of damage to the stove.

The Big E features an automatic fuel feed system, which simplifies operation by delivering pellets to the burn pot as needed. The stove’s large 120-pound hopper allows for extended burn times, with some users achieving up to 120 hours of continuous operation on a single load. This makes it ideal for long-term heating needs without frequent refueling.

To maintain efficiency, regularly inspect and clean the burn pot and ash drawer. A clean burn pot ensures proper airflow and combustion, while an empty ash drawer prevents blockages in the system. The stove’s stainless steel burn pot is designed for durability and easy cleaning, further enhancing its low-maintenance design.

For best results, avoid using low-quality or wet pellets, as they can produce excessive ash and reduce performance. Always store pellets in a dry, protected area to maintain their quality. By following these fuel management guidelines, you can enjoy reliable, efficient heat from your Breckwell Big E pellet stove throughout the heating season.

4.4 Monitoring Performance

Monitoring the performance of your Breckwell Big E pellet stove is essential to ensure efficient operation, safety, and longevity. Regular checks help identify potential issues early, allowing you to address them before they escalate. Start by observing the flame pattern and color, which should be steady and bright orange or yellow. A weak or erratic flame may indicate issues with airflow, fuel quality, or ignition.

Check the glass for clarity. A clean view of the flame is not only visually appealing but also a sign of proper function. The stove’s air wash system is designed to keep the glass clean, but occasional manual cleaning may still be necessary. Use a soft cloth and a mild glass cleaner to avoid scratching the surface.

Monitor the ash drawer regularly. Excessive ash buildup can interfere with airflow and combustion efficiency. Empty the ash drawer when it becomes about one-third full, and dispose of the ash in a fire-safe container. Additionally, inspect the burn pot and heat exchange tubes for ash and debris, cleaning them as needed to maintain optimal performance.

The control board on your Breckwell Big E is equipped with diagnostic features to help monitor performance. Pay attention to error codes or unusual sounds, such as rattling or grinding noises, which may indicate worn or damaged components; Refer to the troubleshooting section of this manual for guidance on resolving common issues.

By consistently monitoring your stove’s performance, you can ensure it runs efficiently, safely, and effectively for years to come. Regular maintenance and prompt attention to any problems will maximize your heating experience and protect your investment in the Breckwell Big E pellet stove.

Maintenance and Upkeep

Regular maintenance ensures optimal performance and longevity of your Breckwell Big E pellet stove. Clean the burn pot, heat exchange tubes, and ash drawer daily. Use the built-in heat exchanger cleaner every few days. Inspect venting systems for blockages and ensure proper clearance. Replace worn parts promptly and follow the recommended maintenance schedule for efficient operation.

5.1 Daily Maintenance Tasks

Daily maintenance is crucial to ensure the Breckwell Big E pellet stove operates efficiently and safely. Begin by turning off the stove and allowing it to cool completely before starting any cleaning tasks. Remove ashes from the ash drawer and dispose of them properly. Clean the burn pot and heat exchange tubes using the built-in cleaner to prevent debris buildup. Check the venting system for blockages and ensure proper clearance. Inspect the glass for soot or residue and clean it with a soft cloth or glass cleaner. Wipe down the exterior to maintain its appearance. Additionally, monitor the hopper to ensure it is filled with pellets as needed. Regularly check the auger motor and fuel feed system for proper function. If you notice any unusual noises or performance issues, address them promptly to avoid further problems. Always refer to the manual for specific cleaning tools and methods; By performing these daily tasks, you can extend the life of your stove and ensure consistent heating performance throughout the year. Proper maintenance also helps maintain safety and efficiency, keeping your home warm and comfortable.

Byvella

bad valve guides symptoms

Valve guides are critical for engine performance, supporting valve stems and preventing oil leakage. Symptoms like increased oil consumption, white smoke, and valve noise indicate potential issues.

Overview of Valve Guides and Their Importance

Valve guides are cylindrical components in an engine’s valve train, ensuring proper alignment and support for valve stems. Made from durable materials like bronze or steel, they facilitate smooth valve operation, maintaining alignment and preventing sideways movement. Their role is crucial for efficient engine performance, as they help seal the combustion chamber, preventing oil leakage and ensuring proper airflow. By supporting valve stems, guides enable precise opening and closing of valves, which is essential for optimal combustion and engine efficiency. Their durability directly impacts engine longevity and overall health, making them a vital component in maintaining reliable engine operation.

Consequences of Ignoring Bad Valve Guides

Ignoring bad valve guides can lead to severe engine damage, including increased oil consumption, reduced fuel efficiency, and higher emissions. Over time, worn guides allow oil to enter the combustion chamber, causing blue or white smoke from the exhaust. This can result in damaged piston rings, cylinder walls, and valve train components. Neglecting this issue may lead to costly repairs, decreased engine performance, and potentially even engine failure. Early detection and repair are essential to prevent these consequences and maintain optimal engine health and efficiency over time.

Common Symptoms of Bad Valve Guides

Common symptoms include increased oil consumption, white smoke from the exhaust, blue smoke, valve stem noise, and reduced engine performance, signaling potential valve guide issues.

Increased Oil Consumption

Increased oil consumption is a key indicator of bad valve guides. When guides wear out, engine oil seeps into the combustion chamber, burning with fuel and reducing efficiency. This leads to higher oil usage and frequent top-ups. Over time, it can cause engine damage and increased maintenance costs. Regular inspections and timely repairs are essential to address this issue early, preventing further complications and maintaining engine efficiency.

White Smoke from the Exhaust

White smoke from the exhaust is a clear sign of bad valve guides. This occurs when engine oil leaks through worn guides into the combustion chamber, burning alongside fuel. The combustion of oil produces white smoke, which is often visible during engine startup or acceleration. This issue is distinct from coolant-related white smoke and indicates that oil is entering the combustion chamber. Addressing this symptom early is crucial to prevent further engine damage and maintain performance. Regular inspections and timely repairs can help mitigate the effects of worn valve guides on engine health and efficiency.

Increased Emissions

Increased emissions are a significant indicator of bad valve guides. When guides wear out, engine oil enters the combustion chamber and burns alongside fuel, releasing excessive pollutants. These include unburned hydrocarbons and particulate matter, leading to higher emissions. Over time, this can cause the vehicle to fail emissions tests and contribute to environmental degradation. The presence of oil in the combustion process also creates white smoke from the exhaust. Addressing this issue early is essential to reduce emissions, maintain engine efficiency, and prevent further damage. Regular inspections and timely repairs are critical to resolving this problem effectively.

Blue Smoke from the Exhaust

Blue smoke from the exhaust is a clear indicator of worn valve guides. This occurs when engine oil seeps past damaged guides and burns alongside fuel in the combustion chamber; Unlike white smoke, which is often coolant-related, blue smoke specifically signals oil burning. It’s most noticeable during acceleration or under engine load. Ignoring this symptom can lead to increased oil consumption and further engine damage. Addressing blue smoke early is crucial to prevent severe issues. Consulting a mechanic for proper diagnosis and repair is highly recommended to maintain engine health and efficiency.

Valve Stem Noise

Valve stem noise is a common symptom of worn valve guides. When guides are damaged, they fail to hold the valve stem securely, leading to excessive movement. This results in a tapping or clattering noise, especially during engine operation. The noise often intensifies as the engine heats up and can be more pronounced at idle. If left unaddressed, this wear can progress, causing further damage to the valve train and potentially leading to performance issues. Regular inspections and timely repairs are essential to prevent more severe and costly damage to the engine.

Causes of Bad Valve Guides

The primary causes of bad valve guides include wear and tear over time, excessive heat buildup, and improper engine maintenance. These factors lead to guide deterioration, oil leakage, and engine performance issues.

Wear and Tear Over Time

Wear and tear is the primary cause of bad valve guides. Over time, constant valve stem movement generates mechanical stress and heat, leading to guide deterioration. As guides wear, they develop excessive clearance or become oval-shaped, allowing oil to leak into the combustion chamber. This results in symptoms like increased oil consumption and white smoke from the exhaust. Regular engine inspections and timely maintenance are crucial to address wear before it progresses, ensuring optimal engine performance and preventing costly repairs. Early detection is key to avoiding severe damage.

Excessive Heat Buildup

Excessive heat buildup is a significant factor in valve guide deterioration. High engine temperatures cause the valve guides to expand and contract repeatedly, accelerating wear. This heat stress weakens the guides’ structural integrity, leading to increased clearance between the valve stem and guide. As a result, engine oil can seep into the combustion chamber, causing symptoms like increased oil consumption and white smoke from the exhaust. Excessive heat also exacerbates wear and tear, making it a critical factor in the premature failure of valve guides. Addressing heat-related issues is essential for maintaining engine health.

Improper Engine Maintenance

Improper engine maintenance is a leading cause of valve guide failure. Neglecting regular oil changes, inspections, and using low-quality oil can lead to excessive wear on valve guides. Poor lubrication allows friction to build up, causing the guides to degrade faster. Additionally, infrequent cleaning of engine components can result in debris accumulation, further damaging the valve guides. Over time, this neglect can lead to symptoms like increased oil consumption, white smoke from the exhaust, and valve stem noise. Proper maintenance is crucial to extending the lifespan of valve guides and ensuring optimal engine performance.

Diagnosing Bad Valve Guides

Diagnosing bad valve guides involves visual inspections, measuring valve stem clearance, checking for oil buildup, and conducting compression tests to identify wear and damage effectively.

Visual Inspection of Valve Guides

A visual inspection is a crucial first step in diagnosing bad valve guides. Technicians examine the guides for visible wear, such as scoring or excessive clearance between the valve stem and guide. They also look for signs of oil buildup or leakage around the guides, which can indicate seal failure. Additionally, inspecting the guides for abnormal discoloration or damage from overheating is crucial. This method helps identify worn or damaged guides that may lead to symptoms like increased oil consumption or white smoke from the exhaust. Early detection through visual inspection can prevent further engine damage and costly repairs by addressing issues before they escalate.

Checking Valve Stem Clearance

Checking valve stem clearance involves measuring the gap between the valve stem and guide using a feeler gauge. Excessive clearance indicates wear, allowing oil to seep into the combustion chamber, causing symptoms like blue smoke from the exhaust. Proper clearance ensures efficient engine operation, preventing oil leakage and performance issues. Measuring stem clearance is a precise method to assess guide condition and determine if replacement is necessary. Early detection is key to preventing costly repairs and maintaining engine health. This step is crucial for identifying wear before it leads to more severe damage.

Inspecting for Oil Buildup

Inspecting for oil buildup involves examining the valve guide area for visible residue, a sign of worn guides allowing engine oil to leak into the combustion chamber. This can cause white smoke from the exhaust and decreased fuel efficiency. Technicians remove the exhaust manifold to visually check for excessive oil accumulation. Identifying oil buildup early helps prevent further engine damage, such as cylinder wall wear or piston ring damage. Regular inspections are essential for maintaining engine health and efficiency, ensuring timely repairs before issues escalate.

Compression Testing

Compression testing is a diagnostic method to measure cylinder pressure, identifying low compression caused by worn valve guides. When guides wear, oil enters the combustion chamber, reducing pressure and efficiency. This test helps detect leaks from damaged guides, leading to symptoms like blue smoke from the exhaust. Conducting compression tests allows early detection of issues, preventing costly repairs and maintaining engine performance. Regular testing is crucial for identifying worn guides before they cause significant damage to engine components.

Effects of Bad Valve Guides on Engine Performance

Bad valve guides impair engine performance, leading to reduced fuel efficiency, power loss, and rough idling. These issues collectively affect overall engine health and reliability.

Reduced Fuel Efficiency

Bad valve guides directly impact fuel efficiency by allowing engine oil to enter the combustion chamber. This causes incomplete combustion, as oil mixes with fuel, reducing mileage. Worn guides lead to increased oil consumption and decreased engine performance. The engine must work harder, resulting in lower fuel economy. Over time, this issue worsens, causing significant decreases in efficiency. Recognizing symptoms like white or blue smoke from the exhaust is crucial for early diagnosis. Addressing this problem promptly prevents further damage and restores optimal engine performance.

Engine Power Loss

Worn valve guides can lead to engine power loss by disrupting efficient combustion. When oil seeps into the combustion chamber due to guide wear, it mixes with fuel, causing incomplete combustion. This reduces the engine’s ability to generate power effectively. Over time, this issue can lead to rough idling and decreased performance during acceleration. Addressing valve guide problems early is essential to restore engine power and prevent further damage. Regular inspections and timely repairs help maintain optimal engine performance and efficiency.

Rough Idling

Rough idling is a common symptom of bad valve guides, caused by improper combustion due to oil entering the combustion chamber. Worn guides allow oil to mix with fuel, creating an imbalanced air-fuel mixture. This results in uneven engine operation, manifesting as rough idling. The engine may shake or vibrate excessively, especially when stationary. Ignoring this issue can lead to further damage, such as cylinder wall wear or piston ring failure. Addressing rough idling early is crucial to maintain smooth engine operation and prevent costly repairs down the line.

Repair and Replacement Options

Replacing worn valve guides or rebuilding the valve train are common solutions; Costs vary depending on labor and parts, ensuring proper engine function and longevity.

Replacing Valve Guides

Replacing valve guides involves removing the valve assembly and installing new guides. This repair restores proper valve alignment and prevents oil leakage. Durable materials like bronze or steel are commonly used for longevity. The process typically requires specialized tools and mechanical expertise to ensure precise installation. Proper replacement prevents further engine damage and restores optimal performance. Costs vary depending on labor and parts, but addressing the issue early is crucial for maintaining engine health and efficiency. Regular inspections can help identify worn guides before severe damage occurs.

Rebuilding the Valve Train

Rebuilding the valve train addresses worn or damaged components beyond just the guides. This includes replacing valve stems, seals, and potentially the head itself. The process ensures all parts work harmoniously, restoring engine performance and preventing oil leakage. Specialized tools and expertise are required to dismantle, inspect, and reassemble the system. Rebuilding is cost-effective compared to full engine replacement and is often necessary when multiple components are affected. Properly rebuilt valve trains enhance efficiency, reduce emissions, and prevent future issues, making it a vital repair for maintaining engine longevity and reliability.

Cost Estimates for Repairs

Repair costs for bad valve guides vary depending on severity and labor rates. Replacing guides typically ranges from $500 to $1,500, including parts and labor. If additional components like seals or stems are damaged, costs may increase. In severe cases, rebuilding or replacing the cylinder head can add $1,000 to $3,000, depending on engine complexity. Labor costs often account for the majority of the expense, as disassembly and reassembly are time-intensive. Early detection and repair can prevent more extensive and costly damages down the line, making timely maintenance crucial.

Preventative Maintenance

Regular engine inspections, timely oil changes, and monitoring performance help prevent valve guide issues. Early detection ensures minor fixes, avoiding costly repairs and maintaining optimal engine health always.

Regular Engine Inspections

Regular engine inspections are crucial for identifying early signs of valve guide wear. Technicians check for visible wear, oil buildup, and excessive clearance, ensuring issues are addressed before they escalate. Routine checks help prevent oil leakage and combustion chamber contamination, which can lead to increased emissions and reduced performance. Early detection through inspections allows for timely repairs, avoiding costly damages. By incorporating inspections into maintenance routines, drivers can maintain optimal engine health and prevent complications associated with worn valve guides.

Timely Oil Changes

Timely oil changes are essential for maintaining engine health and preventing valve guide issues. Fresh oil lubricates moving parts, reducing wear and tear, while also cooling the engine. Regular oil changes prevent contaminants from accumulating and causing premature wear on valve guides. Neglecting oil changes can lead to sludge buildup, which exacerbates guide wear and increases the risk of oil leakage. This can result in symptoms like increased oil consumption and blue smoke from the exhaust. By prioritizing oil changes, drivers can protect their engine and extend the lifespan of critical components like valve guides.

Monitoring Engine Performance

Monitoring engine performance is crucial for early detection of bad valve guides. Pay attention to signs like increased oil consumption, white or blue smoke from the exhaust, and unusual valve stem noise. These indicators suggest potential wear on valve guides, which can lead to oil leakage into the combustion chamber. Regularly tracking engine performance helps identify issues before they escalate, preventing costly repairs and maintaining optimal efficiency. Vigilance in observing these symptoms ensures timely intervention, safeguarding engine health and longevity.

Frequently Asked Questions

Common questions include identifying symptoms like increased oil consumption or white smoke, whether driving is safe with bad guides, and typical repair timelines.

How Do I Know If My Valve Guides Are Bad?

Bad valve guides often show symptoms like increased oil consumption, white or blue smoke from the exhaust, and unusual valve stem noise. These signs indicate wear or damage, allowing oil to enter the combustion chamber and affecting engine performance. If you notice these issues, it’s crucial to inspect the valve guides for excessive clearance or oil buildup. Early detection can prevent further engine damage and costly repairs. Regular maintenance and inspections are key to identifying worn guides before symptoms escalate.

Can I Drive with Bad Valve Guides?

Driving with bad valve guides is not recommended, as it can lead to further engine damage. Worn guides allow oil to enter the combustion chamber, causing increased emissions and reduced performance. Over time, this can result in damaged piston rings, cylinder walls, or other critical components. Continuing to drive may exacerbate these issues, leading to costly repairs. Addressing valve guide problems early is essential to prevent severe engine damage and maintain optimal performance. It’s best to have your vehicle inspected and repaired promptly if symptoms persist.

How Long Does It Take to Replace Valve Guides?

Replacing valve guides is a labor-intensive process that typically takes 10 to 15 hours for a skilled mechanic, depending on the engine and accessibility. The job involves disassembling the engine, removing the cylinder head, and installing new guides. While the process is time-consuming, it’s crucial for restoring engine health. Factors like the mechanic’s experience and engine complexity can influence the duration. Plan for additional time if other repairs are needed once the engine is disassembled. Prompt action ensures minimal downtime and prevents further damage.

Addressing bad valve guide symptoms early is crucial to prevent severe engine damage and costly repairs. Regular inspections and timely maintenance ensure optimal engine performance and longevity.

Importance of Addressing Valve Guide Issues Early

Addressing bad valve guide symptoms early is vital to prevent irreversible engine damage. Ignoring these issues can lead to costly repairs, reduced performance, and decreased fuel efficiency. Early intervention ensures minimal damage, maintaining engine health and longevity. Prompt repairs prevent oil leakage, excessive emissions, and further wear on connected components. Regular inspections and timely fixes are essential for sustaining optimal engine function and avoiding future complications. Proactive maintenance not only saves money but also extends the lifespan of your vehicle’s engine, ensuring reliable performance for years to come.

Final Thoughts on Maintaining Engine Health

Maintaining engine health requires vigilance and proactive care, especially regarding valve guides; Regular inspections, timely oil changes, and addressing symptoms promptly ensure optimal performance and longevity. Neglecting issues like increased oil consumption or smoke emissions can lead to severe damage, costing time and money. By prioritizing maintenance, drivers can avoid costly repairs and keep their engines running smoothly. A well-maintained engine not only enhances reliability but also improves fuel efficiency and overall vehicle performance, making it essential to stay informed and proactive about potential issues like bad valve guides.

Byvella

ftc game manual part 1

The FTC Game Manual Part 1 is essential for teams, outlining rules, objectives, and robot requirements. It ensures clarity and fairness in competition, with translations and accessibility features.

1.1 Overview of FTC and Its Importance

FTC (FIRST Tech Challenge) is a robotics competition for students, promoting STEM education through hands-on learning. It fosters innovation, teamwork, and problem-solving skills. The FTC Game Manual Part 1 serves as a foundational guide, outlining rules, objectives, and requirements for robot design. It ensures a fair and structured competition environment, enabling teams to prepare effectively. The manual is crucial for understanding the competition’s framework, making it indispensable for participants worldwide.

1.2 Purpose of Game Manual Part 1

The purpose of FTC Game Manual Part 1 is to provide a comprehensive guide for teams, outlining the rules, objectives, and requirements for the competition. It ensures clarity and uniformity, allowing teams to understand expectations and prepare effectively. This manual serves as the foundation for the season, detailing essential information such as robot specifications, gameplay rules, and safety protocols. Its primary goal is to establish a fair and consistent framework for all participants, fostering innovation and teamwork while ensuring a smooth competition experience.

Key Features of Game Manual Part 1

Game Manual Part 1 provides a comprehensive guide, detailing rules, objectives, robot requirements, and accessibility features. It ensures clarity and consistency for all FTC teams.

2.1 General Rules and Regulations

The FTC Game Manual Part 1 outlines the framework for competition, ensuring fairness and consistency. It details game rules, robot design constraints, and safety protocols. Teams must adhere to these regulations to maintain eligibility. The manual also covers pre-game inspections and field setup requirements. Compliance with these guidelines is essential for a smooth and equitable competition experience. The document is available in multiple languages and formats, including audio versions, to ensure accessibility for all participants. Regular updates and revisions are highlighted to keep teams informed and prepared.

2.2 Game Specifics and Objectives

The FTC Game Manual Part 1 provides detailed game specifics, including objectives, scoring systems, and match dynamics. It outlines the primary goals teams must achieve during competitions to earn points. The manual clarifies game elements, such as alliance requirements, autonomous phases, and endgame procedures. It also explains penalties for violations, ensuring a fair and competitive environment. Teams must thoroughly understand these specifics to strategize effectively and maximize their performance. The manual is updated annually to reflect the current season’s unique challenges and gameplay innovations.

2.3 Robot Design and Build Requirements

The FTC Game Manual Part 1 outlines specific guidelines for robot design and construction, ensuring safety and fairness. It specifies maximum dimensions, weight limits, and approved materials. Teams must adhere to restrictions on prohibited components and ensure compliance with technical standards. The manual also details requirements for electrical and mechanical systems, ensuring robots are built to withstand competition demands. Additionally, it covers inspection processes to verify adherence to these rules. These guidelines help teams design and build robots that meet competition standards while fostering creativity and innovation within established boundaries.

Translations and Accessibility

The FTC Game Manual Part 1 is available in multiple languages, including Russian, and includes audio versions for accessibility, ensuring inclusivity for all participants globally.

3.1 Availability in Multiple Languages

The FTC Game Manual Part 1 is published in multiple languages, including English and Russian, to ensure global accessibility. This translation helps teams worldwide understand the rules clearly and compete fairly. The manual is available on the official FTC website, with versions tailored for traditional and remote competitions. Additionally, translated documents are provided for informational purposes, supporting diverse linguistic needs. This inclusive approach fosters equal participation and ensures that all teams can adhere to the competition guidelines effectively.

3.2 Audio Versions for Accessibility

Audio versions of the FTC Game Manual Part 1 are available to enhance accessibility, particularly for participants with visual impairments. These recordings ensure that all teams can access the rules and guidelines easily. The audio versions are distributed through platforms like Anchor and Spotify, making them widely accessible. This initiative reflects FTC’s commitment to inclusivity, allowing everyone to engage fully with the competition materials. By providing this resource, FTC ensures equitable participation and compliance with accessibility standards.

Updates and Revisions

Regular updates ensure clarity and fairness. Version control tracks changes, while revision histories provide transparency. Staying informed is crucial for compliance and competitive fairness in FTC competitions.

4.1 Version Control and Revision History

The FTC Game Manual Part 1 uses version control to track updates, ensuring transparency. Revision history details changes, helping teams stay informed. The latest version, 1.3, was released on November 15, 2023. Teams must refer to the most recent updates to ensure compliance. A dedicated section outlines all revisions, making it easier to adapt to new rules. Regular checks are crucial for competitive fairness and understanding rule adjustments. Past versions are archived for reference, ensuring accessibility and clarity throughout the season.

4.2 Importance of Staying Updated

Staying updated with the FTC Game Manual Part 1 is crucial for teams to remain compliant and competitive. Regular updates often include rule clarifications, new regulations, and technical adjustments. Failing to stay current can lead to penalties or disqualification. Teams should monitor official channels and review revision histories to ensure they adapt to changes promptly. This proactive approach helps avoid misunderstandings and ensures all members are aligned with the latest guidelines. Consistent updates also reflect the evolving nature of the competition, keeping the game dynamic and fair for all participants. Timely adaptation is key to success in FTC competitions.

Compliance and Inspections

Compliance with FTC Game Manual Part 1 is crucial for fair competition. Inspections ensure all robots meet specified standards and rules, avoiding disqualification.

5.1 Pre-Game Inspections

Pre-game inspections are mandatory for all FTC teams to ensure compliance with the Game Manual Part 1 rules. These inspections verify that robots meet size, weight, and component requirements.

Inspectors check for approved materials, software compliance, and safety standards. Teams must pass inspections to qualify for matches, ensuring fair competition and adherence to regulations.

5.2 Field Inspection Checklists

Field inspection checklists are detailed documents ensuring all robots meet FTC Game Manual Part 1 standards. They cover robot dimensions, weight limits, and approved components.

These checklists also verify software compliance, safety features, and proper documentation. Teams must use the latest version to ensure inspections are accurate and up-to-date.

Q&A System

The Q&A system provides clarification on FTC Game Manual Part 1 rules and is accessible online, offering teams a platform to submit questions for official responses.

6.1 Overview of the Q&A Process

The Q&A process allows teams to submit questions about FTC Game Manual Part 1 via an online system. Questions are reviewed and answered by official FTC representatives, providing clarity on rules and regulations. This process ensures consistency in interpretation and fairness across all teams. Responses are typically published for public access, benefiting the entire FTC community. The Q&A system opens at the start of the season, with updates and answers posted regularly to address emerging queries and concerns.

6.2 Submission Guidelines and Response Process

Teams submit questions through an official online portal, ensuring clarity and specificity. Each query is reviewed by FTC officials, who provide detailed, official responses. Submissions must adhere to specified formats and deadlines. Responses are published on the FTC website, accessible to all teams, promoting transparency. The Q&A system typically opens in September, with updates posted regularly. Teams are encouraged to review these responses to stay informed about rule interpretations and updates. This process ensures equitable access to information, fostering a fair competitive environment for all participants. Regular checks for new Q&A updates are strongly recommended.

Penalties and Violations

Penalties and violations are clearly outlined, addressing illegal moves, unsportsmanlike conduct, and rule breaches. Consequences include point deductions, disqualifications, or other actions to maintain fair competition.

7.1 Common Penalties and Violations

Common penalties include illegal robot movements, interference with opponents, and field violations. Violations may result in point deductions, disqualifications, or match penalties. Teams must adhere strictly to rules to avoid these consequences. Penalties are enforced to maintain fair play and ensure competitor safety. Understanding these guidelines is crucial for successful participation in FTC competitions. Proper adherence ensures smooth gameplay and sportsmanship among teams. Violations are addressed promptly to uphold the integrity of the competition. Teams are encouraged to review rules thoroughly to minimize risks. Penalties are applied consistently across all matches for fairness. Awareness of common infractions helps teams avoid them effectively. Competitors should familiarize themselves with the manual to understand prohibited actions. This ensures a level playing field for all participants. Penalties are designed to promote adherence to the game’s core principles. Teams must remain vigilant to avoid unintentional rule breaches. The manual provides detailed explanations of penalties to guide teams. Understanding these guidelines is essential for strategic planning and compliance. Penalties are enforced to maintain the spirit of the competition and ensure all teams compete fairly. Awareness of common violations enhances overall performance and teamwork.

7.2 Consequences of Non-Compliance

Non-compliance with FTC Game Manual Part 1 rules can lead to penalties, disqualifications, or match forfeiture. Repeated violations may result in removal from competition. Teams must adhere to guidelines to avoid losing points or being disqualified. Consequences escalate with severity, impacting team standings and eligibility for awards. Non-compliance undermines fair play and can tarnish a team’s reputation. Understanding and following rules is crucial to avoid penalties and ensure participation. Teams risk losing opportunities for advancement if they fail to comply. Compliance ensures fair competition and maintains the integrity of the game. Non-compliance can have lasting effects on a team’s performance and future competitions.

Awards and Recognition

Awards are available for non-gameplay achievements, with clear criteria outlined in Part 1. Recognition is given to teams excelling in design, innovation, and community impact.

8.1 Non-Gameplay Awards Criteria

Non-gameplay awards recognize teams for excellence in design, innovation, and community impact. Criteria include creative problem-solving, engineering quality, and effective documentation. Teams are judged on their ability to present unique solutions and demonstrate teamwork; The awards emphasize off-field achievements, such as outreach and collaboration. Detailed guidelines ensure fairness and transparency in selection; These awards celebrate the holistic development of skills beyond competition performance, fostering well-rounded growth in participants.

8.2 Judging Criteria and Submission Guidelines

Judging criteria for awards include technical skill, creativity, and community engagement. Teams must submit documentation showcasing their robot’s design, engineering process, and outreach efforts. Submissions are evaluated based on clarity, innovation, and adherence to FTC values. Guidelines specify required formats, page limits, and deadlines. Early preparation and thorough documentation are crucial for successful submissions. Teams are encouraged to highlight unique aspects of their projects to stand out in the competitive judging process.

Technical Specifications

This section outlines the essential technical specifications, including robot dimensions, weight limits, and approved materials, ensuring compliance with FTC safety and performance standards.

9.1 Robot Dimensions and Weight Limits

This section specifies the maximum dimensions and weight restrictions for FTC robots, ensuring safety and fair competition. Robots must fit within an 18-inch cube and weigh no more than 40 pounds. These limits promote innovative design while maintaining practicality. Teams must adhere to these constraints to pass inspections and compete. The manual also outlines materials approved for construction, ensuring durability and compliance with safety standards. Compliance with these specifications is critical for participation in FTC events.

9.2 Approved Materials and Components

This section details the approved materials and components for FTC robots, ensuring safety and fairness. Teams can use materials like aluminum, steel, and specific plastics, but must avoid hazardous substances. Motors, servos, and control systems must be FTC-approved. Custom components are allowed if they meet safety standards. The manual also lists prohibited materials, such as sharp or flammable items. Teams must source components from approved suppliers or use FTC-provided kits. Compliance with these guidelines ensures robot functionality and safety during competitions. Proper documentation is required for custom parts to verify adherence to regulations.

Software and Programming Tools

The FTC Game Manual Part 1 specifies approved software and tools, including FTC Blocks and Android Studio, to ensure compatibility and fair competition.

10.1 Recommended Software Development Kits (SDKs)

The FTC Game Manual Part 1 highlights the official FTC Software Development Kit (SDK) as the primary tool for robot programming. It supports languages like Java, Kotlin, and Blocks. The SDK includes libraries for motor control, sensor integration, and autonomous routines. Teams can also use Android Studio for advanced programming. These tools ensure compatibility with the FTC Robot Controller and Driver Station apps, streamlining the development process. Regular updates are released to enhance functionality and address compatibility issues, ensuring teams stay aligned with competition standards.

10.2 Programming Tools and Resources

FTC provides a range of programming tools and resources, including the FTC Blocks visual programming tool and text-based environments like Android Studio. These tools support languages such as Java and Kotlin. Teams can access tutorials, sample codes, and community forums for guidance. The FTC SDK integrates with these tools, offering pre-built functions for robot control. Additionally, resources like code templates and debugging guides help teams streamline their development process. Regular updates ensure tools remain compatible with the latest FTC Robot Controller and competition standards, fostering innovation and collaboration among participants.

Field Setup and Configuration

The official field dimensions and layout are detailed in the manual, ensuring consistency. Setup requirements for remote competitions are also outlined to maintain fair play standards.

11.1 Official Field Dimensions and Layout

The FTC field adheres to strict dimensions, measuring 12 feet by 12 feet, with specific zones for scoring and gameplay. The layout includes designated areas for alliance stations, goal zones, and field elements. These specifications ensure uniformity across competitions, allowing teams to design robots and strategies that align with standardized field configurations. Compliance with these dimensions is crucial for fair play and consistent rule enforcement. Detailed diagrams and measurements are provided in the manual for accurate replication of the field setup. This ensures all teams compete on equal terms, fostering a level playing field.

11.2 Setup Requirements for Remote Competitions

Remote competitions require precise field setup to ensure fair play and consistency. Teams must replicate the official field dimensions, using approved materials and configurations. The setup includes proper placement of scoring elements, alliance stations, and field boundaries. Stable internet connectivity and camera placement are critical for live streaming and remote judging. Detailed checklists in the manual guide teams through the setup process, ensuring compliance with remote-specific rules. Adherence to these requirements ensures seamless execution of remote events, maintaining the integrity of competition standards. Proper documentation and pre-event inspections are mandatory to validate field setup accuracy.

Safety Guidelines

The FTC Game Manual Part 1 emphasizes general safety protocols, emergency procedures, and proper use of protective gear. Teams must adhere to these guidelines to ensure a safe environment during competitions and practices, minimizing risks and ensuring well-being for all participants.

12.1 General Safety Protocols

The FTC Game Manual Part 1 outlines essential safety protocols to ensure a secure environment for participants. These include proper handling of electrical components, usage of protective gear, and adherence to workspace safety standards. Teams must conduct regular safety inspections and ensure all members are trained in emergency procedures. Compliance with these protocols is mandatory to prevent accidents and injuries, fostering a culture of safety within the competition. Proper documentation and reporting of incidents are also emphasized to maintain accountability and continuous improvement in safety practices. These guidelines are crucial for a successful and injury-free season. Teams are encouraged to review and implement these protocols diligently to safeguard all participants. By prioritizing safety, FTC promotes a responsible and professional approach to robotics competitions. This ensures that all events are conducted with the highest regard for participant well-being. Additionally, the manual provides resources and checklists to assist teams in maintaining a safe working environment, both during preparation and at competitions. Through these measures, FTC aims to minimize risks and ensure a positive experience for everyone involved. Adherence to these protocols is not only a requirement but also a shared responsibility among all participants. By fostering a safety-conscious community, FTC sets a standard for excellence in robotics education and competition.

12.2 Emergency Procedures

The FTC Game Manual Part 1 details emergency procedures to ensure quick and effective responses during competitions or practices. These include evacuation plans, fire safety measures, and first aid protocols. Teams must establish communication channels for reporting incidents and contacting emergency services. Regular drills are recommended to prepare members for potential crises. The manual also outlines steps for handling equipment malfunctions or hazards, ensuring minimal disruption and prioritizing participant safety. By following these procedures, teams can address emergencies efficiently, minimizing risks and ensuring a swift return to normal operations. Proper training and awareness are key to effective implementation. Regular reviews of these protocols are essential to maintain readiness and adapt to new scenarios. Teams are responsible for familiarizing all members with emergency procedures to ensure a coordinated and safe response. This proactive approach helps safeguard everyone involved in FTC events. Adherence to these guidelines is critical for maintaining a secure and resilient environment. Emergency preparedness is a shared responsibility, and the manual provides clear guidance to support teams in this effort. By staying informed and prepared, FTC participants can confidently handle unexpected situations, ensuring the safety and success of all involved. The manual emphasizes the importance of staying calm and following established protocols during emergencies, as well as documenting incidents for future reference and improvement. These measures collectively contribute to a culture of safety and preparedness within the FTC community.

Season Preparation

The FTC Game Manual Part 1 provides a detailed timeline for release and team strategies to prepare early, ensuring a smooth start to the competition season.

13.1 Timeline for Manual Release

The FTC Game Manual Part 1 is typically released mid-July or early August, providing teams with essential rules and guidelines for the upcoming season. Teams should monitor the FIRST website for updates, as the manual may undergo revisions. Historical data shows that Version 1.3 was rereleased on November 15, 2023, emphasizing the importance of staying informed. The timeline ensures teams have adequate time to prepare, with additional resources like audio versions and translations available for accessibility. Regular updates are posted on the FIRST resource library and official forums.

13.2 Team Strategies for Early Preparation

Teams should start by thoroughly reviewing the FTC Game Manual Part 1 to understand rules and objectives. Assigning roles and creating a project plan helps distribute tasks effectively. Early robot design brainstorming and prototyping are crucial for adherence to specifications. Utilizing recommended SDKs and programming tools ensures compatibility. Teams should also familiarize themselves with the Q&A system for clarifications. Regular updates on the manual’s release and revisions are essential for staying informed. By organizing resources and timelines, teams can maximize their preparation and competitiveness in the upcoming season. Early preparation builds a strong foundation for success.

Byvella

how do i convert a pdf to a tiff file

How to Convert a PDF to a TIFF File

Converting a PDF to a TIFF file is a straightforward process that ensures high-quality image conversion. Simply upload your PDF‚ select TIFF as the output format‚ and initiate the conversion. Once completed‚ download the TIFF file for further use. This method preserves the original layout and formatting‚ making it ideal for professional and personal needs.

Converting a PDF to a TIFF file is a common requirement for preserving document quality and layout. TIFF format offers high-resolution images‚ making it ideal for professional use. Various methods exist for this conversion‚ including online tools‚ software solutions‚ and manual processes. Online converters like Zamzar and CloudConvert provide quick and easy solutions‚ often supporting batch conversion. Software tools such as Adobe Acrobat and Icecream PDF Converter offer more control over settings. Additionally‚ command-line utilities like ImageMagick allow for advanced conversion options. Ensuring high-quality output and considering factors like file size and compression are crucial. This guide explores these methods‚ helping users choose the best approach for their needs‚ whether for single files or batch processing.

Step-by-Step Guide to Converting PDF to TIFF

Converting a PDF to a TIFF file involves uploading the PDF‚ selecting TIFF as the output format‚ initiating the conversion‚ and downloading the resulting file. This process ensures high-quality image retention and is suitable for both professional and personal use.

Step 1: Upload Your PDF File

Uploading your PDF file is the first step in converting it to a TIFF format. Most online tools and software solutions allow you to easily drag and drop your PDF file into the designated area or browse your computer to select it. Some platforms also support email uploads for remote access. Ensure your PDF file is in a compatible format and within the size limits specified by the converter. Once uploaded‚ you can preview the file to confirm it is the correct document. This step is crucial as it sets the foundation for the rest of the conversion process. A smooth upload ensures a seamless and high-quality conversion experience.

Step 2: Select TIFF as the Output Format

After uploading your PDF file‚ the next step is to choose TIFF as your desired output format. Most conversion tools‚ whether online or software-based‚ will present you with a list of available formats. Selecting TIFF from this list ensures that your PDF is converted into the appropriate image format. Depending on the tool you’re using‚ you might also have the option to adjust settings like resolution or compression to optimize the quality of the output file. It’s important to verify that TIFF is selected to ensure the conversion process meets your requirements for image quality and format specificity. This step is crucial for achieving the desired outcome in your PDF to TIFF conversion.

Step 3: Start the Conversion Process

Once your PDF is uploaded and TIFF is selected as the output format‚ initiate the conversion by clicking the “Convert” button. The tool processes the file‚ converting each page into a high-quality TIFF image. Depending on the tool‚ this step may take a few seconds to several minutes‚ especially for large files. Ensure your internet connection is stable if using an online converter. After processing‚ the tool will notify you that the conversion is complete. This step is automated‚ requiring minimal input‚ and ensures your PDF is accurately transformed into a TIFF file‚ maintaining the original layout and quality.

Step 4: Download the Converted TIFF File

After the conversion process is complete‚ the final step is to download the TIFF file. Most tools provide a clear “Download” button once the conversion is finished. Clicking this button will prompt your browser to save the TIFF file to your computer. Depending on the tool‚ the file may be downloaded directly or provided in a ZIP archive. Ensure you select a suitable location for saving the file. This step finalizes the process‚ allowing you to access and use the TIFF file as needed. The download is typically quick‚ ensuring you have your converted file ready for immediate use. Always verify the file’s quality and integrity after downloading to ensure a successful conversion.

Online Tools for PDF to TIFF Conversion

Popular online tools like Zamzar‚ CloudConvert‚ and JPedal offer quick and reliable PDF to TIFF conversion. These platforms provide user-friendly interfaces‚ high-quality output‚ and fast processing speeds.

Zamzar Online Converter

Zamzar is a free online converter that allows users to convert PDF files to TIFF format seamlessly. The process is simple: upload your PDF‚ select TIFF as the output format‚ and click “Convert Now.” The tool handles the rest‚ providing high-quality TIFF files without requiring any software downloads or sign-ups. Its user-friendly interface and quick conversion speeds make it a popular choice for both individual and batch conversions. Zamzar supports various file formats and ensures that the converted files maintain their original quality‚ making it a reliable option for professional and personal use.

CloudConvert Online Service

CloudConvert is a versatile online tool designed to convert PDF files to TIFF format efficiently. With its advanced conversion technology‚ it ensures high-quality output while maintaining the original file’s integrity. To use CloudConvert‚ simply upload your PDF file‚ select TIFF from the list of supported formats‚ and initiate the conversion process. The tool also supports batch conversions‚ allowing users to process multiple files at once. CloudConvert is known for its user-friendly interface and fast conversion speeds‚ making it a reliable choice for both individual and bulk conversions. Additionally‚ it supports various other file formats‚ including DOCX‚ PPTX‚ and XLSX‚ catering to a wide range of user needs.

JPedal Commercial Converter

JPedal is a professional solution for converting PDF files to TIFF format‚ offering high-quality output and reliability. It supports multi-page TIFF files‚ ensuring that all pages from the PDF are accurately converted. JPedal allows users to customize settings‚ such as compression options‚ to optimize file size and quality. While it is a commercial tool‚ JPedal provides a free option for individual file conversions‚ making it accessible to a wide range of users. The process is straightforward: upload the PDF‚ select TIFF as the output format‚ and initiate the conversion. Once completed‚ the TIFF file can be downloaded for use. JPedal is ideal for users who require precise control over their conversions and need a tool that balances quality with efficiency.

Free Online PDF to TIFF Converters

Free online PDF to TIFF converters offer a convenient and cost-effective way to convert files without requiring software installation. These tools are user-friendly‚ typically involving a simple upload of the PDF file‚ selecting TIFF as the output format‚ and initiating the conversion. Many services‚ such as Zamzar and CloudConvert‚ provide quick and accurate conversions. They support both single and batch processing‚ allowing users to convert multiple files at once. The converted TIFF files can then be downloaded in a zip file for easy access. These tools are ideal for individuals and businesses needing occasional conversions without the commitment of purchasing software. They ensure high-quality output while maintaining the original layout and formatting of the PDF document.

Software Solutions for PDF to TIFF

Software solutions like Icecream PDF Converter and SautinSoft PdfFocus .Net offer reliable tools to convert PDFs to TIFF. They support single or batch conversions with advanced settings for resolution and compression‚ ensuring high-quality output while maintaining the original layout and formatting. These programs are ideal for users needing professional-grade conversions with flexibility and control over the final result.

Icecream PDF Converter

Icecream PDF Converter is a user-friendly tool designed to convert PDF files into various formats‚ including TIFF. It supports single and batch conversions‚ allowing users to process multiple files simultaneously. The software offers advanced settings‚ such as resolution and compression options‚ ensuring high-quality TIFF images. With its intuitive interface‚ users can easily upload PDFs‚ select TIFF as the output format‚ and start the conversion process. Additionally‚ it preserves the original layout and formatting‚ making it suitable for professional and personal use. The converter is compatible with Windows 11 and 10‚ providing a reliable solution for converting PDFs to multipage TIFF files efficiently.

SautinSoft PdfFocus .Net

SautinSoft PdfFocus .Net is a powerful .NET library designed to convert PDF files into various formats‚ including TIFF. It supports the creation of multipage TIFF files‚ ensuring that each page of the PDF is accurately rendered as a separate image; The library offers flexible settings‚ such as resolution and compression options‚ allowing developers to customize the output according to their needs. With its robust API‚ PdfFocus .Net integrates seamlessly into .NET applications‚ enabling efficient batch processing of PDF files. This tool is ideal for developers who need to automate PDF-to-TIFF conversions within their software solutions‚ ensuring high-quality results while maintaining the original document’s integrity and layout.

Command Line Tools for PDF to TIFF

Command line tools like tiffcp and ImageMagick offer efficient ways to convert PDFs to TIFF files. These tools provide precise control over conversion settings‚ such as resolution and compression‚ making them ideal for advanced users and batch processing tasks. They are often faster and more customizable than graphical interfaces‚ allowing for automation and integration into scripts or workflows. These utilities are particularly useful for developers and professionals requiring high-quality‚ precise conversions without the need for GUI interactions.

tiffcp Command Line Utility

Tiffcp is a powerful command-line tool for converting PDF files to TIFF format. It allows users to specify various parameters‚ such as resolution‚ compression‚ and color depth‚ ensuring high-quality output. By utilizing tiffcp‚ users can directly convert PDFs to multi-page or single-page TIFFs. The utility supports batch processing‚ making it efficient for handling multiple files simultaneously. Tiffcp is particularly advantageous for developers and power users who need precise control over their conversions. Its flexibility and robust features make it a reliable choice for professional environments requiring consistent and accurate image conversion.

ImageMagick Convert Command

The ImageMagick convert command is a versatile tool for converting PDFs to TIFF files. To achieve this‚ use the command: `convert -density 300 input.pdf -compress LZW output.tiff`. The `-density` option sets the resolution‚ ensuring high-quality output. `-compress LZW` reduces file size without compromising quality. For multi-page PDFs‚ ImageMagick automatically handles pagination‚ creating a single multi-page TIFF. Ensure Ghostscript is installed‚ as ImageMagick relies on it for PDF processing. This method is efficient for users familiar with command-line interfaces‚ offering precise control over conversion settings; It is ideal for professional environments requiring consistent and accurate image conversion. The command supports various compression algorithms‚ enhancing flexibility for different needs.

Manual Methods for Converting PDF to TIFF

Manually convert PDF to TIFF using software like Adobe Acrobat or alternative PDF viewers. Open the PDF‚ select “Export” or “Save As‚” choose TIFF format‚ and adjust settings as needed for optimal quality and size.

Using Adobe Acrobat

Open the PDF in Adobe Acrobat‚ navigate to the “File” menu‚ and select “Export” to choose TIFF format. Adjust settings like resolution and compression for optimal quality‚ then export the file.

Using Alternative PDF Viewers

Alternative PDF viewers like Smallpdf‚ ILovePDF‚ or PDFCrowd offer easy conversion to TIFF. Open the PDF in the viewer‚ select “Convert” from the menu‚ and choose TIFF as the output format. Adjust settings such as resolution and compression if needed. These tools often support batch processing‚ allowing multiple PDFs to be converted simultaneously. Once settings are configured‚ initiate the conversion and download the TIFF file. These viewers are user-friendly and provide high-quality output without requiring advanced technical knowledge. They are ideal for users seeking a straightforward solution without installing software.

Batch Conversion of PDF to TIFF

Batch conversion allows processing multiple PDFs to TIFF simultaneously‚ saving time. Use online tools or software to upload several files‚ select TIFF‚ and download the converted files efficiently.

Batch Processing with Online Tools

Batch processing with online tools simplifies converting multiple PDFs to TIFF files simultaneously. Most platforms allow uploading up to 20 files at once. After selecting TIFF as the output format‚ the conversion begins automatically. Once completed‚ you can download all converted files in a zip archive. This method is efficient for users who need to handle numerous documents without manually converting each one. It’s also free and requires no software installation‚ making it accessible for everyone. Ensure your files are within the size limits specified by the tool to avoid any issues during conversion.

Batch Conversion Using Software

Batch conversion using software is an efficient way to convert multiple PDF files to TIFF format at once. Programs like Icecream PDF Converter and SautinSoft PdfFocus .Net support bulk processing‚ allowing you to add multiple PDFs to the queue. Once added‚ select TIFF as the output format and customize settings such as resolution or compression if needed. The software will process all files automatically‚ saving you time. This method is ideal for users who regularly handle large volumes of documents. Many software tools also offer advanced features like multi-page TIFF support‚ ensuring all pages from each PDF are combined into a single TIFF file. This makes batch conversion a reliable and time-saving solution for professional and personal use.

Best Practices for High-Quality Conversion

For optimal results‚ use high-resolution settings and minimal compression to preserve image quality. Ensure the software or tool supports multi-page TIFF for maintaining document structure and clarity.

Settings for Optimal Image Quality

Selecting the right settings is crucial for achieving high-quality TIFF conversions. Choose a high resolution (300 DPI or higher) to ensure sharp images‚ especially for text and graphics. Enable color depth settings to match your document’s needs‚ such as 24-bit for vibrant visuals. Use lossless compression to avoid quality degradation. For multi-page PDFs‚ opt for multi-page TIFF to retain the document structure. Adjust resizing options carefully to avoid pixelation. Disable any downsampling unless necessary. Use RGB or CMYK color modes based on your requirements. Ensure the conversion tool supports these settings to maintain the original PDF’s integrity and clarity in the TIFF output. Properly configured settings will result in professional-grade images suitable for printing or archiving.

Resizing and Compression Options

Resizing and compression options play a key role in optimizing your TIFF files. Resize images to fit specific dimensions while maintaining aspect ratio for consistent output. Use compression algorithms like LZW or ZIP to reduce file size without sacrificing quality. Choose between lossless and lossy compression based on your needs—lossless for high-quality archiving and lossy for smaller files. Select appropriate color depth and bit depth to balance quality and file size. Disable compression if retaining maximum quality is essential. Adjust resizing settings carefully to avoid pixelation‚ ensuring text and graphics remain crisp. Optimize these settings based on the intended use of the TIFF file‚ whether for web‚ print‚ or storage‚ to achieve the best balance between quality and efficiency.

Frequently Asked Questions

Resizing and compression options play a key role in optimizing your TIFF files. Resize images to fit specific dimensions while maintaining aspect ratio for consistent output. Use compression algorithms like LZW or ZIP to reduce file size without sacrificing quality. Choose between lossless and lossy compression based on your needs—lossless for high-quality archiving and lossy for smaller files. Select appropriate color depth and bit depth to balance quality and file size. Disable compression if retaining maximum quality is essential. Adjust resizing settings carefully to avoid pixelation‚ ensuring text and graphics remain crisp. Optimize these settings based on the intended use of the TIFF file‚ whether for web‚ print‚ or storage‚ to achieve the best balance between quality and efficiency.

Why Choose TIFF Over Other Formats?

TIFF (Tagged Image File Format) is a popular choice for converting PDFs due to its high-quality output and versatility. Unlike formats like JPEG‚ TIFF supports lossless compression‚ preserving the original image quality without any data loss. This makes it ideal for professional environments‚ such as publishing‚ graphic design‚ and archiving. TIFF files also support multiple pages‚ making them efficient for storing and managing multi-page documents. Additionally‚ TIFF is widely accepted across various industries and is compatible with most image-editing software. Its ability to maintain precise color accuracy and detailed text makes it superior to other formats for high-resolution requirements. Choosing TIFF ensures your converted files remain crisp‚ clear‚ and professional-grade‚ making it the preferred format for critical applications where quality cannot be compromised.

Troubleshooting Common Issues

When converting PDF to TIFF‚ common issues may arise‚ such as corrupted files‚ incorrect formatting‚ or compatibility problems. A corrupted PDF can prevent successful conversion‚ so ensure the file is intact before proceeding. Large PDF files may exceed size limits‚ causing errors; consider splitting or compressing the PDF first. Compatibility issues with older software can also occur‚ so check for updates or use alternative tools. Additionally‚ low-resolution output may result if settings are not optimized; adjust resolution options for better quality. If the conversion is slow‚ especially with batch processing‚ consider using optimized tools or command-line utilities for faster results. Addressing these issues ensures a smooth and efficient conversion process.

Byvella

piano chords finger positions pdf

Piano chords are the foundation of harmonious music, requiring precise finger placement for optimal sound. Learning correct finger positions enhances technique and versatility, with downloadable PDF guides offering structured lessons and exercises to master chord fingerings efficiently.

Understanding the Basics of Piano Chords

Piano chords are groups of notes played simultaneously, forming the harmonic foundation of music. Mastering finger placement is essential for smooth transitions and clear sound. By using downloadable PDF guides, beginners can learn proper fingerings for major and minor chords, root positions, and inversions. These resources provide structured lessons and exercises, helping pianists build a strong technical foundation. Proper finger placement enhances speed, accuracy, and expressiveness, making it vital for effective chord playing and overall musical progress.

The Importance of Proper Finger Placement

Proper finger placement is crucial for pianists, enabling efficient transitions between chords and enhancing speed and accuracy. It forms the technical basis for expressive and precise playing, reducing fatigue and improving overall performance quality significantly.

Enhancing Technique and Efficiency Through Correct Finger Placement

Correct finger placement streamlines chord transitions, reducing finger stretching and fatigue. It fosters muscle memory, consistency, and precision, allowing pianists to play complex passages with ease and clarity. Proper finger placement enhances dexterity, enabling faster and more accurate chord changes. This fundamental skill is essential for building technical proficiency and expressive playing. Downloadable PDF guides provide structured exercises to master finger positions, ensuring efficient practice and gradual improvement in piano technique.

Finger Numbering System

The finger numbering system assigns digits 1-5 to each finger, aiding consistent chord fingerings. This standardized approach ensures clarity and precision in piano technique and instruction.

Assigning Numbers to Fingers for Effective Chord Playing

The finger numbering system is essential for effective chord playing, assigning numbers 1-5 to each finger. This standardized approach ensures consistency and clarity in chord fingerings, making it easier to learn and play complex chords. By understanding which fingers correspond to specific notes, pianists can navigate chord structures more efficiently. PDF guides often include detailed finger assignments, helping musicians master proper techniques and avoid common errors. This system is foundational for building proficiency in piano chord playing.

C Major Chord

The C Major Chord consists of the notes C, E, and G. To play it, place your right thumb on C, index finger on E, and middle finger on G. Ensure proper hand positioning for clarity and comfort, keeping wrists relaxed. Press all keys simultaneously for a clear sound. Practice finger placement and coordination to achieve a smooth, harmonious chord. Use downloadable PDF guides for precise finger positions and inversion techniques to enhance your practice.

Finger Positions for C Major Root Position

In the C Major root position, the right-hand thumb plays C, the index finger plays E, and the middle finger plays G. For the left hand, the fifth finger plays C, the third finger plays E, and the second finger plays G. Maintain a relaxed hand position, with wrists slightly lifted. Ensure fingers press the keys firmly for a clear sound. Practice this finger placement to build muscle memory and improve chord clarity. Downloadable PDF guides provide visual aids for precise finger positions and proper hand alignment.

Finger Positions for C Major Inversions

In the first inversion of C Major (E-G-C), the right-hand index finger plays E, the middle finger plays G, and the thumb plays C. For the left hand, the second finger plays E, the third finger plays G, and the fifth finger plays C. In the second inversion (G-C-E), the right-hand middle finger plays G, the thumb plays C, and the index finger plays E. The left hand uses the third finger for G, the fifth finger for C, and the second finger for E. Consistent practice of these finger placements ensures smooth transitions and clear chord sounds. Downloadable PDF guides provide detailed charts for mastering these inversions effectively.

G Major Chord

The G Major chord is a fundamental harmony in piano music. For the root position, the right hand uses fingers 1 (G), 3 (B), and 5 (D). The left hand mirrors this pattern, ensuring balanced sound and proper technique. Downloadable PDF guides provide clear finger charts for mastering the G Major chord in both root and inverted forms, enhancing your chord-playing skills effectively.

Finger Positions for G Major Root Position

Finger positions for the G Major root position are straightforward. For the right hand, place finger 1 on G, finger 3 on B, and finger 5 on D. The left hand mirrors this pattern, with finger 1 on G, finger 3 on B, and finger 5 on D. This ensures a balanced and clear sound. Proper finger placement is essential for maintaining clarity and avoiding muddiness. Downloadable PDF guides provide detailed charts for mastering the G Major root position effectively.

Finger Positions for G Major Inversions

G Major inversions require precise finger placement. In the first inversion, the right hand places finger 1 on B, finger 3 on D, and finger 5 on G. The left hand follows a similar pattern. For the second inversion, finger 1 on D, finger 3 on G, and finger 5 on B. Proper finger positioning ensures smooth transitions and clear harmonies; Downloadable PDF guides provide detailed charts for mastering G Major inversions, enhancing accuracy and musicality in your performances.

D Major Chord

The D Major Chord consists of D, F#, and A. Proper finger placement, as shown in downloadable PDF guides, enhances clarity and playing efficiency for both hands.

Finger Positions for D Major Root Position

The D Major Chord in root position consists of the notes D, F#, and A. For the right hand, place finger 1 on D, finger 3 on F#, and finger 5 on A. The left hand mirrors this pattern, with finger 5 on D, finger 3 on F#, and finger 1 on A. Proper finger placement ensures clarity and ease of playing. Downloadable PDF guides provide detailed diagrams for mastering these positions effectively.

Finger Positions for D Major Inversions

The first inversion of D Major places F# in the bass. For the right hand, finger 1 plays F#, finger 3 plays A, and finger 5 plays D. The left hand mirrors this with finger 5 on F#, finger 3 on A, and finger 1 on D. The second inversion positions A in the bass. Right hand: finger 1 on A, finger 3 on D, finger 5 on F#. Left hand: finger 5 on A, finger 3 on D, finger 1 on F#. Proper finger placement ensures smooth transitions between inversions. PDF guides provide clear diagrams for mastering these fingerings effectively, enhancing versatility in playing complex musical passages with precision and clarity.

A Minor Chord

The A minor chord consists of the notes A, C, and E. Proper finger placement is essential for playing this chord effectively, as it forms the basis of minor harmonies in various musical compositions.

Finger Positions for A Minor Root Position

In the root position of an A minor chord, the right-hand fingers are typically placed as follows: finger 1 on A, finger 3 on C, and finger 5 on E. For the left hand, finger 5 plays the A, finger 3 plays the C, and finger 1 plays the E. Proper hand alignment and finger curvature are crucial for clarity and ease of playing. This configuration allows for a balanced sound and smooth transitions between notes, enhancing overall technique and musicality.

Finger Positions for A Minor Inversions

Inversions of the A minor chord require adjusting finger placements to maintain a smooth sound. First inversion (C-E-A) uses right-hand fingers 1 on C, 3 on E, and 5 on A. Second inversion (E-A-C) places fingers 1 on E, 3 on A, and 5 on C. For the left hand, fingerings adapt similarly, ensuring each note is clear. These fingerings help in transitioning seamlessly between chords and creating fluid harmonic progressions, essential for expressive playing and technical accuracy.

E Minor Chord

The E minor chord is a fundamental harmony in music. Proper finger placement is essential for smooth, clear playing. PDF guides provide detailed fingerings for root position and inversions.

Finger Positions for E Minor Root Position

For the E minor root position, place your right-hand thumb on the E key, middle finger on G, and pinky on B. The left hand mirrors this pattern. Ensure fingers are curved for optimal reach and sound quality. This configuration allows smooth transitions to inversions. PDF guides provide visual aids for precise placement, helping pianists master the E minor chord efficiently. Proper finger positioning enhances clarity and resonance, essential for expressive playing.

Finger Positions for E Minor Inversions

In first inversion, the E minor chord is voiced as G-B-E. For the right hand, place your thumb on G, index on B, and middle on E. The left hand mirrors this pattern. In second inversion, the chord is B-E-G. Use your thumb on B, index on E, and middle on G for both hands. Proper finger placement ensures smooth transitions and clear sound. PDF guides provide detailed charts for mastering these inversions, enhancing your ability to play complex harmonies with precision and confidence.

Seventh Chords

Seventh chords add depth and emotion to music. They consist of a root, third, fifth, and seventh. Proper finger placement is crucial for smooth transitions and rich sound.

Finger Positions for C Major Seventh Chord

The C Major Seventh chord is played with the 1st, 3rd, 5th, and 7th notes of the C Major scale. For the right hand, use fingers 1 (C), 3 (E), 5 (G), and 7 (B) on the white keys. The left hand can mirror this pattern for inversion. Proper finger placement ensures clarity and resonance, making this chord a staple in harmonious compositions and improvisations.

Finger Positions for G Seventh Chord

The G Seventh chord combines the root, third, fifth, and seventh notes. For the right hand, fingers 1 (G), 3 (B), 5 (D), and 7 (F) are used. The left hand mirrors this pattern for inversions. Proper finger placement ensures smooth transitions and rich harmonies, making this chord versatile in various musical styles and essential for expressive playing.

Common Chord Progressions

Chord progressions use Roman numerals (I, ii, IV, V) to denote harmonic structure. Proper finger placement applies universally, enhancing musicality and expression in various keys and styles effectively.

Applying Finger Positions in Musical Contexts

Mastering finger positions is essential for executing chord progressions smoothly. Common progressions like I-IV-V rely on consistent finger placement to ensure seamless transitions between chords. For example, moving from C Major to G Major requires precise finger shifts to maintain clarity and rhythm. Using downloadable PDF guides, pianists can practice these patterns, reinforcing proper fingerings for both root and inverted chords. This practice enhances musicality, allowing for expressive and technically accurate performances across various musical genres and styles.

Practicing Scales for Improved Dexterity

Practicing scales strengthens finger dexterity and improves coordination, essential for smooth chord transitions. Use PDF guides to master proper fingerings and enhance your piano technique effectively.

Major Scales: C Major Scale Fingerings

Mastery of the C Major scale is foundational for pianists. Right-hand fingerings follow 1-2-3-1-2-3-4-5, while the left hand uses 5-4-3-2-1-2-3-4. This sequence ensures smooth, even playing across the keyboard. Downloadable PDF guides provide clear fingering charts for both hands, aiding in consistent practice and muscle memory development; Regular practice of the C Major scale improves dexterity, strength, and coordination, laying the groundwork for more complex scales and chord progressions. Consistent finger placement enhances accuracy and fluidity in performance.

Minor Scales: A Minor Scale Fingerings

The A minor scale, as the relative minor of C Major, shares its key signature. Right-hand fingering typically follows 1-2-3-1-2-3-4-5, while the left hand uses 5-4-3-2-1-2-3-4. Proper finger placement ensures smooth transitions and an even tone. Downloadable PDF guides provide detailed fingering charts for A minor, aiding in consistent practice. Regular practice strengthens dexterity and improves technique, allowing pianists to navigate minor scales with confidence and precision, enhancing overall musical expression and control.

Downloadable Resources

Downloadable PDF guides offer comprehensive lessons on piano chords and finger positions, providing structured exercises and fingerings for major and minor chords, enhancing technique effectively.

PDF Guides for Piano Chords and Finger Positions

Downloadable PDF guides provide comprehensive lessons on piano chords and finger placements, offering structured exercises and fingering charts for major and minor chords. These resources include detailed diagrams for root positions, inversions, and chord progressions, helping pianists master complex harmonies. Ideal for both beginners and advanced players, these guides enhance technique, improve dexterity, and offer a clear path to mastering piano chords. Consistent practice with these materials ensures efficient and expressive playing.

Visual Aids for Learning

Diagrams, charts, and infographics simplify understanding of piano chord finger placements, offering clear visual representations of chord structures and finger positions for effective learning and practice.

Using Diagrams and Charts to Reinforce Finger Placement

Visual aids like diagrams and charts are invaluable for mastering piano chord finger positions. They provide clear, at-a-glance representations of chord structures, finger numbers, and hand placements. These tools help learners quickly identify root notes, inversions, and finger assignments, making practice more efficient. diagrams often include color-coding or labels to highlight specific fingers or keys, ensuring clarity. By referencing these visuals, pianists can develop muscle memory and improve accuracy. charts also simplify complex chords, breaking them down into manageable parts for better understanding and execution.

Mastering Finger Positions

Consistent practice and slow, deliberate exercises build muscle memory, ensuring accurate and efficient chord transitions. Proper finger placement enhances speed and reduces fatigue, fostering musical expressiveness.

Consistency and Slow Practice Techniques

Mastering piano chord finger positions requires consistent practice, focusing on slow, deliberate movements to build muscle memory. Begin with individual chords, ensuring each finger presses the correct keys. Gradually increase speed as accuracy improves. Use a metronome to maintain steady rhythms while practicing scales and arpeggios. Regular review of chord charts and finger placement guides helps reinforce proper techniques, leading to smoother transitions and enhanced performance quality over time.

Exercises and Etudes

Structured exercises and etudes help refine finger dexterity and chord transitions. These practical applications of finger placement enhance harmonic understanding and improve overall technique effectively, fostering musical fluency.

Practical Applications of Finger Placement

Mastering finger placement enhances chord transitions and harmonic complexity. Practical exercises, such as playing scales and arpeggios, improve dexterity and coordination. Downloadable PDF guides provide structured lessons, while consistent practice ensures smooth execution of complex pieces. Slow practice techniques refine accuracy, allowing for expressive and efficient performances; These methods are essential for building a strong foundation in piano playing and mastering various musical styles effectively.

Common Mistakes to Avoid

Incorrect finger stretching, poor hand positioning, and ignoring proper fingering can lead to inefficiency and fatigue. Recognizing these errors early ensures smoother progression in mastering piano chords.

Recognizing and Correcting Finger Placement Errors

Incorrect finger stretching and poor hand alignment are common mistakes that hinder progress. These errors can lead to fatigue and inefficiency. To address this, identify improper placements during practice. Use downloadable PDF guides to compare correct fingerings with your technique. Regular review of chord charts and slow practice can help correct these issues. Consistent attention to proper finger placement enhances speed, accuracy, and overall musical expressiveness, ensuring a strong foundation for advanced playing.

Benefits of Proper Finger Placement

Proper finger placement boosts speed, efficiency, and accuracy, enabling smooth transitions between chords. It enhances musical expressiveness and reduces fatigue, allowing for more complex and nuanced performances.

Improving Speed, Accuracy, and Expressiveness

Proper finger placement significantly enhances speed by enabling smooth transitions between chords. Accuracy improves as precise finger control reduces errors in complex passages. Expressiveness flourishes through better dynamic and articulation control, allowing for nuanced performances. Efficient finger placement minimizes fatigue, enabling sustained practice and mastery of intricate pieces. By mastering these techniques, pianists achieve a polished and engaging sound, essential for captivating audiences and interpreting music effectively.

Mastery of piano chords begins with proper finger placement, essential for speed, accuracy, and expressiveness. Consistent practice and downloadable PDF guides ensure a strong foundation for lifelong musical growth.

Summarizing Key Points for Effective Learning

Consistent practice and proper finger placement are vital for mastering piano chords. Utilize downloadable PDF guides for structured learning, focusing on root positions and inversions. Slow, deliberate practice enhances technique, while understanding chord progressions applies fingerings musically. Regularly review scales and exercises to build dexterity. Correcting errors early prevents bad habits, ensuring efficient and expressive playing. Emphasize finger independence and hand positioning for optimal results, leveraging visual aids like diagrams to reinforce learning. Patience and dedication yield long-term improvement in piano chord mastery.

Byvella

agilent 6890 manual

Overview of the Agilent 6890 Gas Chromatograph

The Agilent 6890 Gas Chromatograph is a high-performance‚ versatile analytical instrument designed for advanced gas chromatography applications. It offers exceptional reliability‚ precision‚ and flexibility for various industries.

1.1 Key Features and Capabilities

The Agilent 6890 Gas Chromatograph offers exceptional performance with advanced features like high sensitivity‚ programmable temperature control‚ and electronic pressure regulation. It supports multiple detector options‚ including FID‚ TCD‚ and autosamplers‚ ensuring versatility for diverse applications. The system integrates seamlessly with ChemStation software for data analysis and method development. Its robust design allows for high-speed operation while maintaining precision and reliability. Additional features include flexible inlet configurations‚ automated gas flow control‚ and compatibility with various chromatographic techniques. These capabilities make it a preferred choice for pharmaceutical‚ environmental‚ and industrial laboratories.

1.2 History and Evolution of the Agilent 6890 Series

The Agilent 6890 Gas Chromatograph was introduced in the late 1990s by Hewlett-Packard (now Agilent Technologies) as a successor to earlier models. It quickly became a benchmark in gas chromatography due to its innovative design and reliability. Over the years‚ the 6890 series underwent significant updates‚ including the release of the 6890N networked version‚ which enhanced connectivity and data management. Known for its robust performance‚ the 6890 has remained a standard in laboratories worldwide‚ supporting advancements in pharmaceutical‚ environmental‚ and industrial applications. Its evolution reflects Agilent’s commitment to delivering cutting-edge analytical solutions.

Installation and Setup

The Agilent 6890 GC requires careful site preparation‚ including proper ventilation and power supply. Follow the manual for unpacking‚ placing‚ and connecting peripherals before initial startup.

2.1 Site Preparation Requirements

Proper site preparation is essential for the Agilent 6890 GC installation. Ensure the location provides adequate ventilation‚ stable power supply‚ and controlled temperature (15-30°C). The area should be free from vibrations and humidity. Install the GC on a sturdy‚ flat surface. Ensure proximity to gas supplies and electrical outlets; Follow the manual’s guidelines for unpacking and placement. Verify the site meets safety and environmental standards. Consult the Agilent 6890 Site Preparation and Installation Manual for detailed requirements to ensure optimal performance and compliance with safety regulations. Proper preparation prevents operational issues and extends the instrument’s lifespan.

2.2 Physical Installation of the 6890 GC

The Agilent 6890 GC requires careful physical installation to ensure proper functionality. Place the instrument on a stable‚ flat surface‚ ensuring it is level and securely positioned. Connect the gas chromatograph to a grounded electrical outlet and install the RFI cover to minimize interference. Follow the manual’s instructions for connecting gas lines and electrical connections. Ensure all components‚ such as the detector and inlet‚ are correctly aligned and installed. Refer to the Agilent 6890 Site Preparation and Installation Manual for detailed steps. Proper installation ensures safety‚ optimal performance‚ and compliance with regulatory standards; Always use the provided tools and guidelines.

2.3 Connecting Peripherals and Accessories

Connecting peripherals and accessories to the Agilent 6890 GC is crucial for its operation. Ensure all components‚ such as detectors‚ injectors‚ and data systems‚ are properly connected. Use the appropriate cables and adapters as specified in the manual. The 7683 ALS Autosampler and FID detectors are commonly connected peripherals. Follow the installation guide for correct configuration and alignment. Grounding equipment is essential for safety and functionality. Refer to the Agilent 6890 manual for detailed instructions on connecting and configuring accessories to ensure optimal performance and compatibility. Proper connections are vital for accurate results and system reliability.

Operating the Agilent 6890 GC

Operating the Agilent 6890 GC involves several steps‚ including system preparation‚ method setup‚ and sample analysis. Ensure all safety protocols are followed for optimal functionality.

3.1 Basic Operation and Startup Procedures

The Agilent 6890 GC requires a systematic startup process to ensure proper functionality. Begin by powering on the instrument and allowing it to warm up. Check gas supplies and connections to confirm they are secure and meet specifications. Initialize the system through the ChemStation software‚ selecting the appropriate method for your analysis. Perform a leak test and ensure all detectors and inlets are configured correctly. Refer to the manual for detailed instructions on initializing specific components and running diagnostic tests to verify system readiness. Always follow safety guidelines before starting operations.

3.2 Configuring the ChemStation Software

The ChemStation software is the control center for the Agilent 6890 GC‚ enabling method creation‚ data acquisition‚ and system monitoring. Begin by launching the software and selecting the appropriate GC method. Configure parameters such as oven temperature‚ carrier gas flow‚ and detector settings to match your analytical needs. Ensure the system is connected to the network for data sharing and integration. Refer to the manual for step-by-step guidance on setting up sequences‚ customizing reports‚ and optimizing system performance. Proper software configuration is essential for accurate and reliable chromatographic results. Always save settings before initiating a run.

3.3 Setting Up Detectors and Inlets

Proper configuration of detectors and inlets is crucial for optimal performance. For detectors like FID or ECD‚ ensure all connections are secure and aligned with the manual’s specifications. Configure detector parameters such as temperature and gas flows according to the analysis requirements. For inlets‚ select the appropriate mode (split‚ splitless‚ or on-column) based on the sample type. Refer to the manual for detailed instructions on inlet maintenance and replacement of septa or liners. Correct setup ensures precise sample introduction and accurate detection‚ maximizing the efficiency and reliability of your chromatographic analysis. Always follow safety guidelines when handling high-temperature components.

Maintenance and Calibration

Regular maintenance ensures optimal performance. Replace gas tanks‚ check gas lines‚ and clean inlets. Recalibrate detectors periodically for accuracy. Follow manual guidelines for safety and efficiency.

4.1 Routine Maintenance Tasks

Routine maintenance is crucial for optimal performance of the Agilent 6890 GC. Regular tasks include replacing gas tanks‚ inspecting and cleaning inlets‚ and ensuring gas lines are leak-free. Perform flow checks and purge systems to maintain stability. Clean detectors and replace worn or damaged parts. Refer to the official manual for detailed procedures and safety guidelines to ensure proper execution of these tasks. Regular maintenance prevents downtime and ensures accurate results.

4.2 Calibration Procedures for Optimal Performance

Calibration is essential for ensuring the Agilent 6890 GC operates accurately and consistently. Begin by configuring the ChemStation software with predefined methods and parameters. Perform detector calibration according to the manual‚ adjusting sensitivity and baseline settings. Verify gas flow rates and temperature programs to match method requirements. Regularly check and adjust inlet and detector settings to maintain precision. Follow the manual’s guidelines for calibration sequences and reference standards. Ensure all components are within specification to achieve reliable results. Proper calibration ensures optimal performance‚ accuracy‚ and compliance with analytical standards.

4.3 Replacing Consumables and Parts

Regular replacement of consumables and parts is crucial for maintaining the Agilent 6890 GC’s performance. Replace gas tanks‚ columns‚ and inlet liners as specified in the manual. Detector parts‚ such as filaments and jets‚ should be replaced when performance degrades. Follow the manual’s guidelines for disassembling and reassembling components safely. Ensure all parts are genuine Agilent replacements to maintain reliability. Properly discard used consumables and handle hazardous materials according to safety protocols. Routine replacements prevent downtime and ensure accurate‚ consistent results. Refer to the service manual for detailed procedures and recommended schedules.

Troubleshooting Common Issues

The Agilent 6890 GC manual provides detailed troubleshooting guides for common errors‚ including hardware malfunctions and chromatographic issues. Refer to the manual for diagnostic steps and solutions.

5.1 Identifying and Resolving Error Messages

The Agilent 6890 GC manual provides clear guidelines for identifying and resolving error messages. Common issues include system readiness errors‚ gas flow problems‚ and detector malfunctions. Users can troubleshoot by selecting the “Retry” command for minor glitches or referring to the manual’s symptom-based troubleshooting guide. Specific errors‚ such as “Hydrogen Shutdown‚” are addressed with step-by-step solutions. The manual also includes diagnostic tools and maintenance recommendations to prevent recurring issues. Regular system checks and updates ensure optimal performance. Always consult the official manual for detailed error resolution procedures and safety protocols.

5.2 Diagnosing Hardware and Software Problems

The Agilent 6890 manual provides detailed procedures for diagnosing hardware and software issues. Users can identify problems through symptom-based troubleshooting guides‚ system logs‚ and diagnostic software tools. Hardware issues‚ such as faulty detectors or gas flow irregularities‚ are addressed with step-by-step repair instructions. Software-related problems‚ like communication errors or ChemStation glitches‚ are resolved by reinstalling drivers or updating firmware. The manual emphasizes isolating the problem source and consulting specific chapters for tailored solutions. Regular system checks and preventive maintenance are recommended to minimize downtime and ensure optimal performance. Always refer to the official manual for accurate diagnostic procedures.

Specifications and Performance

The Agilent 6890 Gas Chromatograph delivers high-performance‚ versatile‚ and reliable operation for advanced analytical applications‚ ensuring precision and accuracy in various industrial and research settings.

6.1 Technical Specifications of the 6890 GC

The Agilent 6890 GC features advanced microprocessor control‚ enabling precise temperature and pressure management. It supports various detectors‚ including FID‚ TCD‚ and ECD‚ and is compatible with the 7683 ALS Autosampler. The system offers a wide temperature range (-100°C to 400°C) and electronic pressure control (EPC) for accurate gas flow management. With a robust design‚ it ensures stability and reproducibility in demanding analytical environments. The 6890 GC is certified to international safety standards‚ making it suitable for diverse laboratory settings and applications.

6.2 Performance Characteristics and Precision

The Agilent 6890 GC delivers exceptional performance with high sensitivity and reproducibility‚ making it ideal for quantitative analysis. It features precise electronic pressure control (EPC) for consistent gas flow and temperature regulation‚ ensuring accurate chromatographic results. The system supports a wide range of detectors and inlet configurations‚ enhancing versatility. With excellent retention time repeatability and peak area precision‚ the 6890 GC excels in demanding analytical applications. Its advanced design and robust construction ensure long-term reliability and stability‚ meeting the needs of pharmaceutical‚ environmental‚ and industrial laboratories.

Advanced Features and Configurations

The Agilent 6890 GC offers advanced features like Electronic Pressure Control (EPC) for precise gas flow management and flexible configurations to meet specific analytical demands‚ ensuring superior performance.

7.1 Electronic Pressure Control (EPC)

The Agilent 6890 GC features an advanced Electronic Pressure Control (EPC) system‚ enabling precise regulation of gas pressures and flows. This system ensures consistent chromatographic performance by maintaining accurate pressure settings throughout the analysis. EPC allows for real-time adjustments‚ optimizing method development and reproducibility. It supports various inlet configurations and operates seamlessly with the ChemStation software for enhanced control. The EPC system is particularly beneficial for high-precision applications‚ minimizing variability and improving overall efficiency in gas chromatography workflows. Its reliability and flexibility make it a cornerstone of the 6890 GC’s advanced capabilities.

7.2 Autosampler and Injection Systems

The Agilent 6890 GC supports advanced autosampler and injection systems‚ such as the 7683 ALS‚ designed for high-throughput and precise sample handling. These systems enable automated injection of up to hundreds of samples‚ minimizing manual intervention. The autosampler offers programmable injection volumes‚ split/splitless modes‚ and compatibility with various vial sizes. Its robust design ensures consistent performance and accuracy‚ making it ideal for demanding analytical workflows. Integration with ChemStation software allows for seamless method programming and data management‚ enhancing laboratory efficiency and productivity. This system is particularly advantageous for pharmaceutical‚ environmental‚ and industrial applications requiring high sample throughput.

Safety Precautions and Compliance

The Agilent 6890 GC meets IEC Safety Class 1 and Transient Overvoltage standards‚ ensuring safe operation. Always follow safety guidelines for handling hazardous materials and gases.

8.1 Safety Classifications and Certifications

The Agilent 6890 Gas Chromatograph is classified under IEC Safety Class 1 and meets Transient Overvoltage standards‚ ensuring operational safety. It adheres to international regulations‚ including certifications for safe handling of hazardous materials and gases. Compliance with these standards guarantees reliable performance while minimizing risks in laboratory environments. Proper training and adherence to safety guidelines are essential for safe operation. Regular maintenance and inspections further ensure compliance with safety protocols. Always refer to the official manual for detailed safety procedures and certifications.

8.2 Handling Hazardous Materials and Gases

The Agilent 6890 GC requires careful handling of hazardous materials and gases to ensure safe operation. Always use proper ventilation and personal protective equipment (PPE) when working with flammable or toxic gases. Follow established safety protocols for gas cylinder storage‚ connection‚ and disposal. Regularly inspect gas lines and connections to prevent leaks. Ensure compliance with local regulations and laboratory safety standards. Refer to the official manual for detailed guidelines on handling specific hazardous materials and gases. Proper training is essential to minimize risks and maintain a safe working environment. Always prioritize safety when operating the instrument.

Software and Data Analysis

The Agilent 6890 GC operates with ChemStation software‚ enabling precise control‚ data acquisition‚ and analysis. It supports advanced chromatography data management and integrates seamlessly with network systems for efficient workflow.

9.1 ChemStation Software Overview

The ChemStation software is the primary control and data analysis platform for the Agilent 6890 GC‚ offering a user-friendly interface for method development‚ data acquisition‚ and results interpretation. It provides advanced tools for chromatogram analysis‚ peak integration‚ and reporting. ChemStation supports real-time monitoring of GC parameters and integrates seamlessly with network systems for efficient data management. The software also includes features for method optimization‚ custom reporting‚ and compliance with regulatory standards. Its intuitive design ensures ease of use for both novice and experienced operators‚ making it a comprehensive solution for gas chromatography workflows.

9.2 Integrating the 6890 GC with Network Systems

The Agilent 6890 GC seamlessly integrates with network systems‚ enabling efficient data management and collaboration. Through the ChemStation software‚ users can share methods‚ sequences‚ and results across a network. This connectivity supports remote access to the GC system‚ enhancing workflow efficiency. The system also allows for centralized data storage and backup‚ ensuring data integrity and accessibility. Additionally‚ integration with laboratory information management systems (LIMS) is supported‚ streamlining data transfer and compliance with regulatory requirements. Secure authentication and access controls are provided to protect sensitive information. This feature-rich integration capability makes the 6890 GC a versatile tool for modern laboratory environments.

Common Applications and Industries

The Agilent 6890 GC is widely used in pharmaceutical‚ environmental‚ and food safety industries for precise analysis of volatile compounds‚ ensuring high-precision results.

10.1 Pharmaceutical and Biomedical Research

The Agilent 6890 GC is extensively utilized in pharmaceutical and biomedical research for precise analysis of organic and inorganic compounds. It plays a critical role in drug development‚ enabling the detection of impurities and ensuring the purity of active pharmaceutical ingredients. The system’s high sensitivity and accuracy make it ideal for analyzing complex biological samples‚ such as blood‚ tissue‚ and urine. Additionally‚ it is used for quality control in pharmaceutical manufacturing‚ ensuring compliance with regulatory standards. Its versatility and reliability have made it a cornerstone in advancing biomedical research and drug discovery processes.

10.2 Environmental Monitoring and Analysis

The Agilent 6890 GC is widely employed in environmental monitoring for detecting and quantifying pollutants in air‚ water‚ and soil samples. Its high sensitivity and precision enable the analysis of volatile organic compounds (VOCs)‚ pesticides‚ and industrial contaminants. The system supports regulatory compliance by providing accurate data for environmental assessments. It is also used to monitor emissions and ensure air quality standards are met. The 6890 GC’s reliability and versatility make it a valuable tool for laboratories conducting environmental impact studies and ensuring public health safety through rigorous analytical processes.

User Resources and Documentation

The Agilent 6890 GC is supported by comprehensive manuals‚ including installation‚ service‚ and operating guides. These resources provide detailed instructions for setup‚ maintenance‚ and troubleshooting.

11.1 Accessing the Official Agilent 6890 Manual

The official Agilent 6890 manual is available for free online viewing or downloading in PDF format. It includes detailed installation‚ service‚ and operating guides. Users can access manuals through Agilent’s official website or trusted document repositories. The manual covers chapters on gas chromatography basics‚ ChemStation software‚ and troubleshooting. It also provides step-by-step instructions for maintenance‚ calibration‚ and error resolution. Additionally‚ the document includes safety precautions and compliance information. For advanced users‚ it offers insights into configuring electronic pressure control and autosampler systems; These resources ensure optimal operation and maintenance of the Agilent 6890 GC.

11.2 Training and Support Options

Agilent offers comprehensive training programs and workshops for the 6890 GC‚ ensuring users master its operation and maintenance. These sessions cover gas chromatography fundamentals‚ ChemStation software‚ and advanced features like EPC and autosamplers. Online resources‚ including video tutorials and webinars‚ are also available. Additionally‚ Agilent provides dedicated customer support for troubleshooting and technical inquiries. Users can access detailed troubleshooting guides and repair instructions through the official manual or Agilent’s support website. These resources ensure users can optimize their 6890 GC experience and resolve issues efficiently. Expert assistance is also available for complex challenges.

The Agilent 6890 Gas Chromatograph is a robust and reliable analytical tool‚ widely recognized for its versatility and performance in diverse applications. Its advanced features‚ such as electronic pressure control and autosampling‚ make it a preferred choice for industries like pharmaceuticals and environmental monitoring. With comprehensive manuals‚ training programs‚ and dedicated support‚ users can optimize their experience. Regular maintenance and proper troubleshooting ensure longevity and accuracy. This instrument remains a cornerstone in modern gas chromatography‚ delivering precise results and adapting to evolving analytical demands. Its enduring popularity underscores its value in scientific and industrial settings.

Byvella

gone from my sight pdf free

Overview of “Gone From My Sight”

“Gone From My Sight” is a compassionate guide exploring the dying process, offering clarity and comfort. Available as a free PDF, it combines Barbara Karnes’ booklet and Henry Van Dyke’s poem, providing emotional and educational support for end-of-life care.

“Gone From My Sight” is a widely recognized resource in end-of-life education, offering insights into the dying process. Known as “The Little Blue Book,” it has become a vital guide for families and caregivers, providing clarity on the signs of approaching death. The booklet, authored by Barbara Karnes, is complemented by a poem of the same name by Henry Van Dyke, which metaphorically explores loss and perspective. Available as a free PDF, it combines practical information with emotional support, making it accessible to a broad audience. Its popularity stems from its ability to demystify death, reducing fear and uncertainty, while the poem adds a touching literary dimension to the discussion of grief and remembrance.

Significance of the PDF Version

The PDF version of “Gone From My Sight” holds immense significance as a freely accessible resource, making end-of-life education available to all. It combines Barbara Karnes’ booklet and Henry Van Dyke’s poem, offering both practical guidance and emotional solace. The PDF’s digital format ensures easy sharing and distribution, reaching a global audience. Its popularity stems from its ability to demystify the dying process, reducing fear and uncertainty. With over 30 million copies distributed, it remains a cornerstone in hospice care, providing families and caregivers with essential insights. The free PDF also supports grief counseling and memorial services, making it a versatile and invaluable tool for navigating life’s most profound moments.

The Booklet “Gone From My Sight” by Barbara Karnes

Barbara Karnes’ booklet, “Gone From My Sight,” is a pivotal guide on the dying process, offering comfort and clarity. It’s the primary source for end-of-life education, with over 30 million copies sold.

Purpose and Scope of the Booklet

Barbara Karnes’ booklet, “Gone From My Sight,” serves as a compassionate guide to understanding the dying process. Its purpose is to reduce fear and uncertainty by explaining the stages of dying in a simple, gentle, and direct manner. Designed for families and caregivers, it provides clarity on the physical and emotional changes that occur as death approaches. The booklet addresses the unknowns of dying, offering comfort and practical insights to help navigate this profound human experience. Its scope includes explaining the signs of approaching death, the natural progression of the dying process, and how to support loved ones during their final journey. Widely used in hospice care, it remains a trusted resource for end-of-life education and emotional support.

Key Themes and Messages

The booklet emphasizes understanding the natural process of dying, dispelling myths and fears surrounding death. It highlights the importance of empathy and presence for those nearing the end of life. Key themes include the physical changes during dying, emotional support for families, and the normalcy of the dying process. Messages focus on providing comfort, reducing uncertainty, and fostering a peaceful environment for the dying. The content is designed to empower caregivers with knowledge, helping them navigate this sensitive journey with compassion and clarity. By addressing both the practical and emotional aspects of death, the booklet offers a holistic approach to end-of-life care and understanding.

Structure and Content Overview

The booklet “Gone From My Sight” by Barbara Karnes is structured to provide a clear, compassionate guide to the dying process. It begins with an introduction to the topic, followed by detailed explanations of physical changes, emotional challenges, and practical care strategies. The content is divided into sections addressing signs of approaching death, caregiving tips, and emotional support for families. A gentle, direct tone reduces fear and uncertainty, making it accessible to all readers. The inclusion of Henry Van Dyke’s poem adds a touching literary dimension. This booklet is a valuable resource for understanding and navigating end-of-life care with empathy and clarity.

Author Background and Expertise

Barbara Karnes, a renowned hospice nurse and educator, authored “Gone From My Sight” with over 20 years of experience in end-of-life care. Her expertise in understanding the dying process and its emotional impact has made her a trusted voice in the field. Karnes’ compassionate approach and ability to simplify complex topics have earned her widespread recognition. She is also the creator of “The Little Blue Book,” a seminal resource for families and caregivers. Her work has been translated into multiple languages and distributed globally, reflecting her dedication to improving end-of-life care education. Karnes’ background as both a clinician and educator ensures her content is both practical and deeply empathetic.

Impact on End-of-Life Education

“Gone From My Sight” has profoundly influenced end-of-life education, becoming a cornerstone resource for families and caregivers. Its clear, compassionate explanation of the dying process has demystified death, reducing fear and uncertainty. Widely used in hospice care, the booklet has sold over 30 million copies, making it a trusted guide for understanding the signs of approaching death; It has empowered healthcare professionals and families alike, fostering a deeper understanding of the natural dying process. By addressing the emotional and practical aspects of death, it has become an essential tool in end-of-life care education, helping to bridge the gap between clinical observations and family experiences. Its impact is evident in its global recognition and continued relevance in modern hospice care.

The Poem “Gone From My Sight” by Henry Van Dyke

Henry Van Dyke’s poem uses a ship metaphor to describe death, offering comfort by suggesting the departed remain present beyond physical sight, a theme widely used in memorials.

Historical Context and Origins

The poem “Gone From My Sight,” also known as “The Ship,” was first published anonymously in 1904 in Record of Christian Work. Its authorship remains unclear, leading to its classification as a public domain work. The poem uses a powerful maritime metaphor to describe the process of dying, comparing it to a ship fading over the horizon. Over time, it gained popularity for its comforting perspective on loss and death, becoming widely used in funeral and memorial services. Its origins are deeply rooted in early 20th-century literature, and its universal themes have made it a timeless piece for solace and reflection. The poem’s public domain status has enabled its free distribution, including in PDF formats, ensuring its accessibility to a broad audience seeking emotional and philosophical guidance.

Literary Analysis and Interpretation

The poem “Gone From My Sight” masterfully employs a maritime metaphor to illustrate the transition of life to death. A ship departing into the horizon symbolizes the journey of a loved one fading from view, emphasizing that the change lies in the observer’s perspective, not the vessel itself. This profound imagery conveys the idea that death is not an end but a natural progression, offering comfort to those grieving. The poem’s concise yet evocative language makes it a powerful tool for processing loss, resonating deeply with readers seeking solace. Its themes of perspective and transition have solidified its place in funeral and memorial contexts, while its public domain status ensures accessibility, including free PDF versions, for widespread use and reflection.

Themes of Loss and Perspective

The poem “Gone From My Sight” beautifully explores themes of loss and perspective through its maritime metaphor. A ship fades into the horizon, symbolizing the transition of life to death, emphasizing that loss is perceived by the observer, not the vessel itself. This imagery reassures readers that the departed continues their journey, unaffected by the observer’s grief. The poem offers comfort by reframing death as a natural progression, rather than an abrupt end. Its themes of perspective and loss resonate deeply, providing solace to those mourning. The free PDF availability ensures this poignant reflection on loss and transition remains accessible for funeral services and personal contemplation, underscoring its universal relevance and emotional impact.

Use in Funeral and Memorial Services

The poem “Gone From My Sight” is widely used in funeral and memorial services for its comforting and hopeful message. Its metaphor of a ship fading into the horizon resonates with those grieving, offering a gentle perspective on loss. The free PDF version is easily accessible, making it a popular choice for eulogies, readings, or memorial programs. Many funeral planners and families incorporate it to provide solace and reassurance. The poem’s imagery of the ship continuing its journey helps mourners visualize their loved one’s transition, fostering a sense of peace. Its universal appeal and emotional depth make it a cherished resource for honoring and celebrating life during difficult times.

Public Domain Status and Accessibility

The poem “Gone From My Sight” by Henry Van Dyke is in the public domain, ensuring free access and unrestricted use. Published in 1904, its copyright has expired, making it legally available for downloading, sharing, and printing without any licensing fees. The free PDF version is widely accessible online, offered by platforms like Wikisource and other digital archives. This accessibility has facilitated its widespread use in educational materials, funeral services, and personal reflections. The public domain status has also allowed adaptations and distributions, further enhancing its reach and impact. As a result, the poem remains a vital resource for those seeking comfort and understanding during difficult times, ensuring its enduring relevance and availability to the public.

Availability of “Gone From My Sight” as a Free PDF

The free PDF of “Gone From My Sight” is widely available online, offered by platforms like Wikisource and other digital archives due to its public domain status.

Platforms Offering Free Downloads

Several platforms provide free downloads of “Gone From My Sight,” including Wikisource and CozyByKatz. These sites offer the PDF version of both the poem and the booklet, ensuring easy access for users. The poem by Henry Van Dyke is widely available due to its public domain status, while Barbara Karnes’ booklet can also be found on various digital archives. Some platforms, like hospice-related websites, offer the PDF as a resource for end-of-life education. Additionally, online marketplaces and memorial service planning sites provide free downloads of the poem for funeral and remembrance purposes. These platforms ensure that the content is accessible to anyone seeking comfort or educational material on dying and grief.

Legal and Ethical Considerations

The poem “Gone From My Sight” by Henry Van Dyke is in the public domain, making it legally available for free download and use. However, the booklet by Barbara Karnes is copyrighted, and downloading it for free from unauthorized sources may infringe on copyright laws. Users should ensure they access the PDF from legitimate platforms that have permission to distribute the material. Ethically, respecting the author’s rights is crucial, even for educational or personal use. Unauthorized sharing or distribution without proper attribution can undermine the creator’s work and the efforts of publishers. Always verify the legality of the source before downloading to avoid potential legal consequences and support ethical practices in content sharing.

Quality and Format of Free Versions

Free PDF versions of “Gone From My Sight” vary in quality, with some offering clear, readable formats suitable for printing or digital viewing. The poem by Henry Van Dyke is often neatly formatted, preserving its original literary style. However, the booklet by Barbara Karnes may have reduced quality in free versions, potentially missing graphics or suffering from poor OCR (Optical Character Recognition). Certain platforms provide well-structured, professional layouts, while others may lack proper formatting, affecting readability. Users should compare versions from trusted sources to ensure they obtain a high-quality, visually appealing, and complete document that maintains the original intent and presentation of both the poem and the guide.

Popularity and Demand for the Free PDF

The free PDF of “Gone From My Sight” is highly sought after due to its emotional and educational value. Its popularity stems from its role as a widely recognized resource in end-of-life care, making it a go-to guide for families and healthcare professionals. The demand for the free version is driven by its accessibility and the comfort it provides during difficult times. Many platforms, such as CozyByKatz, offer it for download, ensuring widespread availability. Its relevance in funeral and memorial services further enhances its appeal, as it helps individuals process grief and understand the dying process. The free PDF format makes it easily shareable, contributing to its enduring popularity across various communities and cultures.

Comparison with Paid Versions

The free PDF of “Gone From My Sight” is a highly popular choice, offering the same core content as paid versions but without the cost. While paid versions may include additional features like audiobook formats or special packaging, the free PDF provides the essential material needed for understanding the dying process. Its accessibility has made it a preferred option for many, especially those seeking immediate guidance. The free version is widely shared and used in hospice care and memorial services, proving its value despite the absence of a price tag. This accessibility ensures that the resource reaches a broader audience, fulfilling its purpose of educating and comforting those in need.

Relevance and Usefulness of the PDF

The “Gone From My Sight” PDF is a vital resource for end-of-life education, offering practical insights and emotional comfort. Its accessibility makes it indispensable for hospice care and grief support.

Practical Applications in Hospice Care

The “Gone From My Sight” PDF is widely used in hospice care to educate families and caregivers about the dying process. It provides clear, compassionate guidance on physical and emotional changes, helping to reduce fear and uncertainty. The booklet explains the stages of dying, such as changes in breathing, eating, and consciousness, in a gentle yet direct manner. This resource is often distributed to patients’ families to help them understand and prepare for the end-of-life journey. Its practical insights make it an essential tool for hospice professionals, offering both comfort and clarity during a difficult time. The PDF’s accessibility ensures it reaches a broad audience, making it a cornerstone in end-of-life care education.

Emotional Comfort for Grieving Families

“Gone From My Sight” offers profound emotional comfort to grieving families by providing a gentle, compassionate perspective on death. The booklet and poem metaphorically describe the transition of life, reassuring loved ones that the departed continues to exist beyond physical sight. This resource helps alleviate fear and uncertainty, replacing it with understanding and peace. Families find solace in its clear explanations of the dying process, which normalize the experience and foster acceptance. The free PDF ensures accessibility, allowing anyone to find comfort during difficult times. Its heartfelt message resonates deeply, helping families navigate grief with a sense of hope and perspective, emphasizing that death is not an end but a change in presence.

Educational Value for Healthcare Professionals

“Gone From My Sight” serves as an invaluable resource for healthcare professionals, offering clear insights into the dying process. Barbara Karnes’ booklet, known as “The Little Blue Book,” provides a straightforward explanation of the stages of death, helping professionals understand and communicate effectively with patients and families. Its evidence-based approach reduces fear and uncertainty, enabling caregivers to guide loved ones with compassion and clarity. The free PDF version enhances accessibility, making it a practical tool for training and reference. By addressing the emotional and clinical aspects of end-of-life care, it equips healthcare providers with the knowledge to support families during this profound experience, fostering a deeper understanding of the dying process and its natural progression.

Cultural and Religious Sensitivity

“Gone From My Sight” demonstrates cultural and religious sensitivity by addressing the universal themes of loss and dying. The booklet and poem avoid imposing specific beliefs, instead offering a neutral, compassionate perspective that respects diverse traditions. This approach allows individuals from various cultural and religious backgrounds to find comfort and understanding. The resource acknowledges the importance of individual beliefs in the grieving process, making it a valuable tool for caregivers and families navigating end-of-life experiences. Its inclusive tone ensures that it is accessible and sensitive to all, regardless of cultural or religious affiliations, fostering a sense of unity and shared humanity in the face of loss.

Reviews and Testimonials

“Gone From My Sight” has received widespread acclaim for its compassionate and insightful approach to end-of-life care. Readers and healthcare professionals praise the booklet for its ability to demystify the dying process, offering clarity and comfort to families. Many have described it as a vital resource that reduces fear and uncertainty, providing a gentle yet direct guide to understanding death. The free PDF version has been particularly appreciated for its accessibility, making it easier for people to access this valuable information. Testimonials highlight its impact in hospice care, with many noting how it helps bridge the gap between medical explanations and emotional support, making it a cherished tool for both personal and professional use.

“Gone From My Sight” is a heartfelt guide reducing fear around dying. Its simple explanations and free PDF accessibility make it invaluable for end-of-life care and understanding.

Final Thoughts on the Resource

“Gone From My Sight” is a profoundly impactful resource that bridges the gap between the emotional and educational aspects of end-of-life care. Its availability as a free PDF ensures accessibility for all, making it a vital tool for families, caregivers, and healthcare professionals. The combination of Barbara Karnes’ compassionate guide and Henry Van Dyke’s poignant poem creates a holistic understanding of dying, reducing fear and uncertainty. The booklet’s clear explanations of the dying process, paired with the poem’s metaphorical perspective, provide comfort and clarity. Its widespread use in hospice care and memorial services highlights its universal relevance. Ultimately, “Gone From My Sight” remains an indispensable resource for navigating life’s most profound transition.

Recommendation for Readers

“Gone From My Sight” is a must-read for anyone seeking to understand the dying process or find comfort during loss. The free PDF is an invaluable resource for healthcare professionals, caregivers, and families, offering clarity and emotional support. Its gentle yet direct approach demystifies death, reducing fear and uncertainty. The combination of Barbara Karnes’ expertise and Henry Van Dyke’s poetic perspective provides a comprehensive understanding of end-of-life care. Readers will find solace in its reassuring message and practical insights. Whether for personal use or professional guidance, this resource is a compassionate companion for navigating life’s most profound moments. It is a powerful tool for fostering empathy and understanding in end-of-life discussions.

Future of “Gone From My Sight” in Digital Formats

The future of “Gone From My Sight” in digital formats is promising, with its free PDF availability ensuring widespread accessibility. As technology evolves, the booklet and poem will likely be adapted into interactive e-books and audiobooks, enhancing user engagement. The integration of multimedia elements, such as videos and infographics, could deepen understanding of the dying process. Additionally, the rise of digital platforms will continue to facilitate easy downloads and sharing, making this resource even more indispensable for end-of-life education. Its timeless message and growing digital presence ensure that “Gone From My Sight” will remain a vital resource for future generations seeking comfort and clarity in life’s final journey.

Byvella

smith corona typewriter manual

Welcome to the Smith Corona Typewriter Manual! This guide provides essential information for understanding‚ operating‚ and maintaining your typewriter․ Explore features‚ troubleshooting‚ and care tips․

1․1 Overview of the Smith Corona Typewriter

The Smith Corona typewriter is a versatile and reliable writing tool‚ celebrated for its durability and intuitive design․ Known for its advanced features like automatic centering‚ bold printing‚ and correction capabilities‚ it caters to both professionals and casual users․ Popular models such as the Classic 12‚ Super-Silent‚ and Sterling showcase the brand’s commitment to quality․ With a focus on user-friendly functionality‚ Smith Corona typewriters remain a favorite among writers and collectors‚ blending vintage charm with practical efficiency․ Their enduring appeal lies in their ability to enhance writing experiences while maintaining a timeless aesthetic․

1․2 Importance of the Manual for Users

The Smith Corona typewriter manual is an indispensable resource for users‚ offering comprehensive guidance on operation‚ maintenance‚ and troubleshooting․ It ensures optimal performance by detailing time-saving features and error correction techniques․ The manual also provides step-by-step maintenance instructions‚ including cleaning and lubrication‚ to extend the typewriter’s lifespan․ Whether you’re a novice or an experienced user‚ this guide helps maximize efficiency and productivity․ By following its instructions‚ users can resolve common issues independently‚ minimizing downtime and enhancing their overall typing experience․ This makes the manual a crucial companion for anyone owning a Smith Corona typewriter․

1․3 Key Features of the Smith Corona Typewriter

The Smith Corona typewriter boasts advanced features that enhance typing efficiency and quality․ Models like the Classic 12 and Super-Silent offer smooth operation‚ while the Sterling provides durability․ Key features include automatic centering‚ bold printing‚ and underscore options․ Correction memory and half-space functionality allow for easy error correction․ These typewriters are known for their reliability and versatility‚ making them ideal for both professional and creative writing․ Their timeless design and robust construction have made them favorites among collectors and writers alike․

History of the Smith Corona Typewriter

The Smith Corona typewriter has a rich history‚ evolving from early models to becoming a trusted brand in writing․ Its innovative designs and durability solidified its legacy․

2․1 Evolution of the Smith Corona Brand

The Smith Corona brand emerged in the late 19th century‚ blending innovation with craftsmanship․ From early portable models to advanced electric typewriters‚ the brand consistently delivered reliability and quality․ Over time‚ Smith Corona became synonymous with durability and user-friendly designs‚ adapting to technological advancements while maintaining its reputation for excellence in writing instruments․ This evolution cemented its place as a trusted name in the typewriter industry‚ favored by writers and professionals alike for generations․

2․2 Popular Models and Their Significance

Smith Corona produced several iconic models that gained widespread popularity․ The Smith Corona Classic 12 is renowned for its reliability and ease of use‚ making it a favorite among writers․ The Super-Silent model introduced noise-reduction technology‚ ideal for shared workspaces․ Meanwhile‚ the Sterling series became a symbol of durability and portability‚ appealing to professionals․ Each model reflects Smith Corona’s commitment to innovation and user-centric design‚ ensuring their enduring relevance in the world of typewriters․ These models remain cherished for their performance and timeless appeal․

2․3 Impact on Writing and Office Work

The Smith Corona typewriter revolutionized writing and office work by offering efficiency and reliability․ Its advanced features‚ such as automatic centering and bold printing‚ streamlined document creation․ The typewriter became an essential tool for professionals‚ enabling faster and more accurate typing․ It also played a key role in creative writing‚ with many authors relying on it for drafting novels and letters․ The typewriter’s influence extended beyond offices‚ fostering productivity and creativity in various settings․ Its impact remains evident in the enduring popularity of vintage models among writers and collectors today․

Models of Smith Corona Typewriters

Smith Corona offers iconic models like the Classic 12‚ Super-Silent‚ and Sterling‚ each known for durability and innovative features‚ catering to both professionals and enthusiasts․

3․1 Smith Corona Classic 12

The Smith Corona Classic 12 is a highly regarded portable typewriter known for its reliability and sleek design․ Featuring a 12-inch carriage‚ it offers ample space for typing lengthy documents․ Its durable construction and smooth typing mechanism make it a favorite among writers and collectors; The Classic 12 is equipped with features like automatic centering and bold printing‚ enhancing user convenience․ With its timeless appeal‚ it remains a popular choice for both professional and personal use‚ making it a standout model in the Smith Corona lineup․ Its portability and versatility have solidified its place in typewriter history․

3․2 Smith Corona Super-Silent

The Smith Corona Super-Silent is a noise-reducing typewriter designed for quiet efficiency‚ ideal for shared workspaces or home use․ Its advanced sound-dampening technology minimizes typing noise while maintaining smooth operation․ The Super-Silent features a robust 12-inch carriage and a range of user-friendly options‚ including automatic centering and variable line spacing․ Built with durability in mind‚ this model is favored by professionals and hobbyists alike․ Its combination of functionality and noise reduction makes it a versatile choice‚ ensuring a distraction-free typing experience․ The Super-Silent exemplifies Smith Corona’s commitment to innovation and user satisfaction․

3․3 Smith Corona Sterling

The Smith Corona Sterling is a highly regarded portable typewriter known for its durability and exceptional typing experience․ Its sleek design and precision engineering make it a favorite among professionals and hobbyists alike․ The Sterling features a 12-inch carriage‚ advanced typing mechanics‚ and a smooth‚ responsive keyboard․ It is particularly noted for its reliability and consistent performance‚ making it a top choice for writers and collectors․ The Sterling’s robust construction ensures it withstands heavy use‚ while its portability allows for easy transport․ This model is a testament to Smith Corona’s legacy of producing high-quality‚ user-friendly typewriters․

Maintenance and Cleaning

Regular maintenance ensures smooth operation and longevity of your Smith Corona typewriter․ Follow step-by-step cleaning guides‚ lubricate moving parts‚ and check oil requirements to keep it functioning optimally․

4․1 Importance of Regular Maintenance

Regular maintenance is crucial for ensuring the longevity and optimal performance of your Smith Corona typewriter․ Dust buildup‚ dried ink‚ and worn parts can hinder functionality if left unaddressed; Cleaning the keys‚ lubricating moving components‚ and checking for wear can prevent mechanical issues․ Neglecting maintenance may lead to costly repairs or reduced efficiency․ By following a consistent upkeep routine‚ you can preserve the typewriter’s functionality and ensure it continues to serve as a reliable tool for writing and office tasks․ Proper care extends its lifespan and maintains its performance quality․

4․2 Step-by-Step Cleaning Guide

To keep your Smith Corona typewriter in excellent condition‚ follow this cleaning guide․ First‚ unplug the typewriter and turn it off․ Use a soft‚ dry cloth to wipe the exterior‚ removing dust and dirt․ For the keys‚ gently brush or use compressed air to eliminate debris․ Avoid liquids‚ as they may damage electrical components․ For stubborn stains‚ dampen a cloth with water‚ but ensure it’s not soaking wet․ Clean the ribbon spools and typebars with a lint-free cloth․ Regularly inspect and clean the carriage return mechanism to maintain smooth operation․ Proper cleaning ensures optimal performance and longevity․

4․3 Lubrication and Oil Requirements

Regular lubrication is essential to maintain the smooth operation of your Smith Corona typewriter․ Use a lightweight machine oil‚ applying it to the carriage mechanism‚ typebars‚ and hinges․ Avoid over-lubrication‚ as excess oil can attract dust․ Gently wipe away any drips with a soft cloth․ Lubricate every 6 months or when mechanical parts feel stiff․ For optimal performance‚ ensure all moving parts are well-oiled but not soaked․ Proper lubrication prevents rust and ensures the typewriter functions efficiently․ Always test the typewriter after oiling to confirm smooth operation․ This maintenance step is crucial for extending the lifespan of your machine․

Accessories for Smith Corona Typewriters

Accessories like ribbon spools‚ correction strips‚ and compatible typewriter ribbons are essential for optimal performance․ These items enhance functionality and ensure quality output․

5;1 Ribbon Spools and Ink Options

Ribbon spools are vital for maintaining your Smith Corona typewriter’s performance․ They come in various colors‚ including black‚ red‚ and dual-color options․ Proper installation ensures consistent ink flow and clear typing․ Always use compatible spools to prevent damage․ Regular replacement is recommended to avoid fading and smudging․ Additionally‚ high-quality ink options are available to enhance text clarity and durability․ For specific models like the Smith Corona Classic 12 or Super-Silent‚ ensure ribbons match the spool size for optimal functionality and longevity․

5․2 Correction Strips and Tipp-Ex Usage

Correction strips and Tipp-Ex are essential for fixing errors on your Smith Corona typewriter․ These strips allow you to correct typos without lifting the paper‚ ensuring a clean finish․ Tipp-Ex correction strips are widely available in packs of 10 and are a convenient solution for minor mistakes․ Gently apply the strip to the error‚ ensuring minimal pressure to avoid damaging the typewriter’s mechanism․ This method is ideal for maintaining professionalism in your work․ Always use compatible correction products to preserve the quality of your typewriter and documents․ Tipp-Ex remains a popular choice for efficient corrections․

5․3 Compatible Typewriter Ribbons

Finding the right typewriter ribbon for your Smith Corona is crucial for maintaining print quality․ Ribbons are available in black‚ red‚ or dual-color options‚ ensuring vibrant text․ Many models‚ such as the Smith Corona Classic 12‚ use standard half-inch ribbons․ Look for compatible spools designed for Smith Corona models like the Corsair‚ Zephyr‚ or Calypso․ New and never-used ribbons are still produced‚ making them accessible․ Ensure the ribbon matches your typewriter’s specifications to avoid damage․ Properly installed‚ these ribbons will enhance your typing experience․ Always check reviews for quality and compatibility before purchasing․ This ensures optimal performance․

Typewriter Repair and Troubleshooting

This section covers common issues and solutions for Smith Corona typewriters․ Learn DIY fixes and when to seek professional help to keep your machine functioning smoothly․

6․1 Common Issues and Solutions

Common issues with Smith Corona typewriters include jammed keys‚ stuck mechanisms‚ and ribbon problems․ Regular cleaning and lubrication often resolve these issues․ For jammed keys‚ gently lift the typebars or use a small tool to free them․ Stuck keys may require disassembling the keyboard or applying light oil․ Ribbon problems can be fixed by adjusting tension or replacing the ribbon․ Electrical issues‚ such as a non-working motor‚ may need professional attention․ Always refer to the manual for specific guidance․ Proper maintenance can prevent many of these issues․

6․2 DIY Repair Tips

For minor repairs‚ start with cleaning the typewriter thoroughly using compressed air and a soft-bristle brush․ Lubricate moving parts with silicon-based sprays to ensure smooth operation․ Adjust margin stops and alignment by loosening screws and realigning the carriage․ For stuck keys‚ gently lift typebars or apply light oil․ Replace worn-out ribbons with compatible spools‚ ensuring proper tension․ Avoid forcing parts‚ as this can cause further damage․ For complex issues‚ consult the manual or seek professional help․ Regular DIY maintenance can extend the life of your Smith Corona typewriter․

6․3 Professional Restoration Services

For intricate repairs or vintage restoration‚ professional services are recommended․ Experts specialize in reviving Smith Corona typewriters‚ ensuring precise mechanical adjustments and cosmetic renewal․ They often source rare parts and apply traditional techniques to restore functionality and aesthetics․ Many restoration services include cleaning‚ oiling‚ and thorough testing to guarantee optimal performance․ Some companies also offer customization options‚ such as repainting or upgrading features․ Professional restoration not only extends the typewriter’s life but also preserves its historical value․ Choosing a reputable service ensures your Smith Corona is restored to its original charm and efficiency․

User Manuals and Guides

Access official Smith Corona typewriter manuals online‚ available in multiple languages․ These guides provide detailed instructions for operation‚ troubleshooting‚ and maintenance‚ ensuring optimal use of your typewriter․

7․1 How to Download the Manual

Downloading the Smith Corona typewriter manual is straightforward․ Visit the official website or trusted sources like London Typewriters․ Navigate to the support section‚ select your model‚ and click the download link․ Manuals are available in PDF format and multiple languages‚ including English‚ French‚ and Spanish․ Ensure compatibility with your typewriter model before downloading․ Save the file for easy access and reference․ If unsure‚ contact customer support for assistance․ This ensures you have the correct guide tailored to your specific Smith Corona typewriter․

7․2 Navigating the Manual for Beginners

Navigating the Smith Corona typewriter manual is designed to be user-friendly․ Start with the table of contents to locate specific sections‚ such as operation‚ maintenance‚ and troubleshooting․ Key sections include Features‚ Setup‚ and Tips for Efficient Typing․ Use the index to quickly find topics like ribbon replacement or correction techniques․ Manuals are available in multiple languages‚ including English‚ French‚ and Spanish‚ ensuring accessibility․ For beginners‚ focus on the Getting Started and Common Issues sections․ Always ensure the manual matches your typewriter model for accurate guidance․ Visit London Typewriters for additional support․

7․3 Troubleshooting Common Problems

The Smith Corona typewriter manual includes a detailed troubleshooting section to address common issues․ Keys not typing: Check for dust or debris and clean thoroughly․ Ribbon issues: Ensure the ribbon is properly installed and not dried out․ Alignment problems: Adjust the margins or tabs as described․ For error corrections‚ use Tipp-Ex or correction strips․ If the typewriter is unresponsive‚ refer to the diagnostic guide in the manual․ Visit London Typewriters for additional repair tips and resources․ Regular maintenance can prevent many of these issues․

Typing Guides and Tips

Master efficient typing with the Smith Corona typewriter․ This section offers guides on techniques‚ feature usage‚ and efficiency‚ helping you enhance your writing experience․

8․1 Mastering Typing Techniques

Mastering typing techniques on your Smith Corona typewriter begins with proper hand positioning and finger placement․ Ensure your hands rest comfortably on the keyboard‚ with fingers curved over the keys․ Practice drills to improve speed and accuracy‚ starting with simple exercises like typing single rows repeatedly․ Pay attention to the tactile feedback of the keys to avoid pressing too hard or too softly․ Regular practice helps develop muscle memory‚ enhancing your typing efficiency․ For optimal results‚ maintain a steady rhythm and adjust your posture to avoid fatigue during long typing sessions․

8․2 Using Advanced Features

The Smith Corona typewriter offers advanced features to enhance your typing experience․ The automatic centering function ensures precise alignment for headings and titles․ To use this feature‚ simply press the centering key and type your text․ Bold printing can be activated by pressing the shift lock and the bold key simultaneously‚ providing emphasis where needed; Additionally‚ the underscore feature allows you to highlight text by pressing the underscore key after typing․ For correcting errors‚ the half-space feature enables precise backspacing․ Experiment with these features to optimize your typing efficiency and achieve professional-quality results․ Refer to the manual for troubleshooting tips on advanced functions․

8․3 Enhancing Writing Efficiency

Maximize your productivity with the Smith Corona typewriter by utilizing its built-in efficiency tools․ The touch control feature allows for adjustable keyboard sensitivity‚ enabling faster typing․ The margin release button helps in setting precise margins‚ reducing errors․ Additionally‚ the ribbon selector lets you switch between black and red ink effortlessly․ Regular maintenance‚ such as cleaning and lubricating‚ ensures smooth operation․ Familiarize yourself with these features to streamline your workflow and produce polished documents․ Explore more tips in the manual to unlock the full potential of your Smith Corona typewriter․

Legal and Warranty Information

This section outlines the terms of use‚ disclaimers‚ liability clauses‚ and warranty details for Smith Corona typewriters․ Understanding these is crucial for compliance and support․

9․1 Disclaimer and Liability Clause

Smith Corona disclaims liability for direct‚ indirect‚ special‚ incidental‚ or consequential damages arising from typewriter use or inability to use․ This includes data loss or recovery costs․ Users assume all risks associated with operation․ The company shall not be held responsible for damages‚ even if advised of their possibility․ This clause applies to all scenarios‚ ensuring protection for Smith Corona against claims arising from product use or performance․ Proper use adherence is the user’s responsibility‚ as outlined in the manual․

9․2 Warranty Terms and Conditions

Smith Corona typewriters are backed by a limited warranty covering manufacturing defects for a specified period․ The standard warranty includes parts and labor for one year from the purchase date․ Coverage excludes damage caused by misuse‚ improper maintenance‚ or unauthorized repairs․ Warranty claims require proof of purchase and must adhere to Smith Corona’s guidelines․ For details‚ refer to the manual or contact customer support․ Proper registration and adherence to maintenance schedules are essential for warranty validity; Terms may vary by model and region‚ so review your specific agreement carefully․

9․3 Data Protection and Privacy Policy

Smith Corona is committed to protecting your personal data and ensuring compliance with all applicable privacy laws․ Your information is collected solely for warranty registration‚ customer support‚ and service improvements․ Data is stored securely and never shared with third parties without consent․ Users are responsible for maintaining confidentiality of their account details․ By using Smith Corona products‚ you agree to the terms outlined in this policy․ Regular updates to this policy will be posted online‚ and continued use implies acceptance of any changes․ For more details‚ refer to the full privacy statement in the manual․

Compatible Typewriter Models

Smith Corona models‚ including Corsair‚ Zephyr‚ Calypso‚ Empire Corona‚ Skyriter‚ and Tower Chieftain‚ are compatible with various accessories like ribbons and correction strips․

10․1 Smith Corona Corsair

The Smith Corona Corsair is a compatible and versatile typewriter model‚ known for its reliability and smooth typing experience․ It works seamlessly with a variety of accessories‚ including ribbon spools and correction strips‚ making it a popular choice for both vintage enthusiasts and practical users․ The Corsair’s design ensures compatibility with standard Smith Corona ribbons‚ allowing for easy maintenance and customization․ Its durability and performance make it a standout model in the Smith Corona lineup‚ ideal for everyday use or collector restoration․ Regular cleaning and proper care ensure optimal functionality․

10․2 Smith Corona Zephyr

The Smith Corona Zephyr is a lightweight and portable typewriter model‚ designed for ease of use and mobility․ Its compact design makes it ideal for writers who need a reliable machine on the go․ Compatible with standard 1 5/8-inch ribbon spools‚ the Zephyr ensures consistent typing performance․ Regular cleaning and lubrication are essential to maintain its smooth operation․ This model is a favorite among vintage typewriter enthusiasts and casual users alike‚ offering a blend of functionality and portability․ Its durability and versatility make it a standout choice for everyday writing tasks and creative projects․

10․3 Smith Corona Calypso

The Smith Corona Calypso is a sleek and portable typewriter designed for ease of use and durability․ Known for its lightweight construction‚ it is ideal for writers seeking a reliable machine for on-the-go use․ Compatible with standard ribbon spools‚ the Calypso ensures consistent performance․ Regular maintenance‚ such as cleaning and lubrication‚ is essential to preserve its functionality․ This model is favored by both vintage enthusiasts and casual users‚ offering a perfect blend of style and practicality․ Its user-friendly design and robust build make it a popular choice for everyday writing tasks and creative projects alike․

Typewriter Restoration Process

Restoring a Smith Corona typewriter involves thorough cleaning‚ lubrication‚ and repair of mechanical components․ This process revives functionality and preserves the machine’s aesthetic appeal for years to come․

Specialized tools and materials are required to ensure precise restoration‚ maintaining the typewriter’s original performance and charm․

11․1 Steps Involved in Restoration

The restoration of a Smith Corona typewriter begins with a detailed inspection to identify worn or damaged parts․ The next step is disassembling the machine‚ carefully cleaning each component with mild detergents and lint-free cloths․ Lubrication of mechanical parts ensures smooth operation․ Replacement of worn items like rubber rollers and feed tires is essential․ Reassembling the typewriter requires precision to align mechanisms correctly․ Finally‚ testing the typewriter for proper function and appearance completes the restoration process‚ ensuring it operates like new․

11․2 Tools and Materials Required

Restoring a Smith Corona typewriter requires specific tools and materials to ensure optimal results․ Essential tools include screwdrivers (both flathead and Phillips)‚ pliers‚ and a soft-bristled brush for cleaning․ Mild detergents and lint-free cloths are used for polishing and removing grime․ Silicone-based oils and grease are necessary for lubricating mechanical parts․ Replacement materials like rubber rollers‚ feed tires‚ and ink ribbons may also be needed․ Additionally‚ specialized typewriter adjustment tools‚ such as a spacing wrench‚ can aid in precise recalibrations․ Having these tools and materials on hand ensures a smooth and effective restoration process․

11․3 Tips for Restoring Vintage Models

Restoring vintage Smith Corona typewriters requires patience and attention to detail․ Start by gently cleaning all surfaces with a soft-bristled brush and mild detergent to remove dust and grime․ Use silicone-based oils to lubricate mechanical components without leaving residue․ Avoid harsh chemicals‚ as they can damage finishes or harm rubber parts․ Inspect and replace worn-out elements like feed tires or ink ribbons․ Test functionality step-by-step to ensure proper operation․ For intricate adjustments‚ consult repair guides or seek professional help․ Proper restoration preserves the typewriter’s heritage and ensures years of reliable use․

The Smith Corona typewriter manual serves as an invaluable resource‚ guiding users through operation‚ maintenance‚ and restoration․ Its timeless design and functionality make it a cherished tool for writers and collectors alike․

12․1 Summary of Key Points

The Smith Corona typewriter manual is a comprehensive guide designed to enhance your typing experience․ It covers essential topics such as maintenance‚ troubleshooting‚ and accessory usage․ Key features include step-by-step cleaning guides‚ lubrication requirements‚ and DIY repair tips․ The manual also highlights advanced typing techniques and efficiency-enhancing strategies․ Whether you’re a seasoned user or a beginner‚ this guide provides valuable insights to maximize your typewriter’s performance․ By following the manual‚ you can ensure longevity and optimal functionality of your Smith Corona typewriter‚ making it a reliable tool for writing and creative projects․ Explore further to unlock its full potential!

12․2 Benefits of Using a Smith Corona Typewriter

The Smith Corona typewriter offers numerous benefits for writers and enthusiasts․ Its durability and reliability ensure long-lasting performance‚ while its intuitive design makes it user-friendly․ Advanced features like automatic centering and bold printing enhance creativity and productivity․ The typewriter’s portability and versatility also make it ideal for various settings‚ from home use to professional environments․ Additionally‚ the availability of compatible accessories and comprehensive manuals ensures easy maintenance and troubleshooting․ Whether for drafting novels or creating personalized letters‚ the Smith Corona typewriter provides a unique and satisfying writing experience‚ combining traditional charm with practical functionality․

12․3 Encouragement to Explore Further

Curious about Smith Corona typewriters? Dive into their rich history and models like the Classic 12 or Super-Silent․ Discover how these machines shaped writing and office work․ Explore maintenance tips to keep your typewriter in prime condition․ Check out accessories‚ repair guides‚ and user manuals online․ Whether you’re a collector or a writer‚ Smith Corona offers a timeless tool for creativity․ Visit websites like London Typewriters for restoration services and vintage models․ Join communities to share experiences and learn from enthusiasts․ Your journey into the world of Smith Corona typewriters is just beginning—enjoy the adventure!

Byvella

bad valve guides symptoms

Valve guides are essential for engine efficiency, ensuring valves operate smoothly․ Symptoms of wear include blue smoke, increased oil use, misfires, and rough idling․ Early detection is crucial for preventing engine damage and maintaining performance․

1․1 Understanding the Role of Valve Guides in Engines

Valve guides play a critical role in engine functionality by directing the movement of valves, ensuring proper alignment, and preventing excessive wear․ They are designed to keep valves in straight motion, maintaining precise contact with valve seats․ Guides also prevent engine oil from leaking into the combustion chamber, which could cause inefficiency and damage․ Typically made of durable materials, valve guides withstand high temperatures and constant mechanical stress․ Their proper function is essential for maintaining compression, preventing oil contamination, and ensuring smooth engine operation․ If compromised, they can lead to performance issues and increased oil consumption, highlighting their importance in overall engine health and efficiency․

1․2 Importance of Identifying Symptoms Early

Identifying bad valve guide symptoms early is crucial for preventing severe engine damage․ Neglecting these signs can lead to costly repairs, such as replacing entire engine components․ Early detection allows for timely maintenance, reducing the risk of complications like engine overheating or misfires․ Regular inspections and addressing issues promptly ensure optimal performance and extend the engine’s lifespan․ Delaying repairs can exacerbate wear on related parts, leading to more extensive and expensive fixes․ Therefore, staying vigilant about symptoms like blue smoke or rough idling is essential for maintaining engine health and avoiding long-term damage․

Common Symptoms of Bad Valve Guides

Bad valve guides often manifest through blue smoke from the exhaust, increased oil consumption, engine misfires, rough idling, performance issues, and unusual engine noises․

2․1 Blue Smoke from the Exhaust

Blue smoke from the exhaust is a clear indicator of bad valve guides․ This occurs when engine oil leaks into the combustion chamber, often due to worn guides․ As the oil burns, it produces a distinctive blue smoke․ This symptom is most noticeable during startup or when the engine is under load․ Ignoring this issue can lead to further damage, such as fouled spark plugs and increased oil consumption․ Addressing the problem early is essential to prevent more severe engine damage and maintain optimal performance․

2․2 Increased Oil Consumption

Increased oil consumption is another common symptom of bad valve guides․ Worn guides allow engine oil to seep into the combustion chamber, where it is burned alongside fuel․ This not only reduces the engine’s oil levels but also leads to thicker exhaust smoke․ Drivers may notice frequent trips to the gas station to top off their oil․ If left unchecked, this issue can result in fouled spark plugs and decreased engine performance․ Regular oil level checks and addressing valve guide wear early can help mitigate these problems and prevent more severe engine damage over time․

2․3 Engine Misfires and Rough Idling

Engine misfires and rough idling are often linked to worn valve guides․ When guides are damaged, valves may not seat properly, leading to incomplete combustion․ This can cause misfires, especially during idle or under light load conditions․ Rough idling may also occur, creating vibrations and an uneven engine rhythm․ Over time, this can strain the engine and lead to poor fuel efficiency․ Misfires may trigger the check engine light, while rough idling can make driving uncomfortable․ Addressing these issues early is crucial to avoid further damage to the engine’s components, such as spark plugs or catalytic converters․ Prompt repair of valve guides can restore smooth engine operation and performance․

2․4 Performance Issues and Power Loss

Worn valve guides can directly impact engine performance, leading to power loss and reduced efficiency․ When valve guides are damaged, improper valve seating and lubrication issues arise, disrupting the combustion process․ This can result in hesitation during acceleration and a noticeable decrease in power output․ Additionally, performance issues may manifest as a lack of responsiveness, particularly under load or at higher RPMs․ Over time, this can lead to decreased fuel efficiency and overall engine performance degradation․ If left unaddressed, these issues can escalate, causing more severe damage to engine components․ Early diagnosis and repair of faulty valve guides are essential to restore optimal engine performance and prevent further complications․

2․5 Unusual Engine Noises

One of the noticeable symptoms of bad valve guides is unusual engine noises, particularly a clicking, tapping, or clattering sound․ This noise is often most pronounced when the engine is cold or during initial startup․ As the engine warms up, the noise may temporarily subside but could return under load or acceleration․ The sound is caused by excessive clearance between the valve stem and the guide, leading to improper alignment and movement․ Over time, this can result in further damage to the valves and surrounding components․ The noise may also be accompanied by other symptoms like misfires or rough idling, making it a clear indicator of worn or damaged valve guides that require immediate attention to prevent further engine deterioration․

Causes of Bad Valve Guides

Wear and tear over time, high mileage, lack of maintenance, and insufficient lubrication are primary causes of bad valve guides, leading to engine issues․

3․1 Wear and Tear Over Time

Valve guides naturally deteriorate due to prolonged engine operation․ Continuous exposure to heat, friction, and mechanical stress causes the guides to wear down, leading to increased clearance․ This wear can result in improper valve alignment, reducing engine efficiency and potentially causing oil leakage into combustion chambers․ Over time, this deterioration can lead to noticeable symptoms such as blue smoke from the exhaust and increased oil consumption․ Regular inspections and maintenance are crucial to identifying wear early, preventing further damage, and ensuring optimal engine performance․ Neglecting this can escalate issues, requiring costly repairs and potentially leading to engine failure․

3․2 High Mileage and Lack of Maintenance

High mileage and inadequate maintenance significantly contribute to valve guide deterioration․ Over time, the constant motion of valves within their guides leads to wear, exacerbated by infrequent servicing․ Lack of proper lubrication allows friction to accelerate guide wear, while carbon buildup from combustion byproducts further degrades the components․ Neglecting regular maintenance can result in excessive clearance between the valve stem and guide, causing oil to seep into the combustion chamber․ This leads to symptoms like blue smoke from the exhaust and increased oil consumption․ Addressing these issues early through routine inspections and maintenance can prevent further damage and extend engine lifespan․

3․3 Insufficient Lubrication

Insufficient lubrication is a primary factor in valve guide deterioration․ Without adequate oil, friction between the valve stem and guide increases, accelerating wear․ Over time, this leads to excessive clearance, allowing oil to enter the combustion chamber․ Symptoms include blue smoke from the exhaust and heightened oil consumption․ Poor lubrication also exacerbates carbon buildup, further degrading the valve train․ Regular oil changes and proper engine maintenance are critical to preventing this issue․ Ignoring lubrication needs can result in premature wear and eventual engine damage, emphasizing the importance of consistent upkeep for optimal performance and longevity․

Diagnosing Bad Valve Guides

Diagnosing bad valve guides involves a compression test to detect leaks, visual inspection for wear, and an oil consumption test to identify excessive usage, ensuring accurate assessment․

4․1 Compression Test

A compression test is a key diagnostic tool for identifying bad valve guides․ By measuring the compression in each cylinder, technicians can detect leaks caused by worn guides․ If a cylinder shows low compression, it may indicate that the valve guide is compromised, allowing oil to enter the combustion chamber․ This test is often performed when symptoms like blue smoke or increased oil consumption are present․ It provides a clear indication of the engine’s internal health and helps pinpoint issues before they escalate into more severe damage․

4․2 Visual Inspection of Valve Guides

A visual inspection of valve guides is a straightforward method to assess their condition․ Technicians typically remove the valve cover to examine the guides for signs of wear or damage․ Excessive clearance between the valve stem and guide, along with visible scoring or worn surfaces, are common indicators of faulty guides․ Additionally, the presence of oil around the guides suggests that they are no longer sealing properly, which can lead to symptoms like blue smoke from the exhaust․ A thorough visual inspection helps confirm suspicions of worn guides and guides further diagnostic or repair steps․

4․3 Oil Consumption Test

An oil consumption test is a reliable method to identify issues related to bad valve guides․ Excessive oil consumption is a common symptom, as worn guides allow engine oil to enter the combustion chamber․ To perform the test, the engine oil is topped up to the recommended level, and the vehicle is driven under normal conditions for a specified period․ The oil level is then checked to measure the amount of oil consumed․ If the oil level drops significantly, it may indicate worn valve guides or other internal engine problems․ This test, combined with other diagnostics, helps confirm the presence of faulty guides and the need for repairs․

Consequences of Ignoring Bad Valve Guides

Ignoring worn valve guides can lead to severe engine damage, including damaged valves, cylinder head issues, and reduced performance․ Regular inspections are vital for preventing these problems․

5․1 Engine Overheating

Engine overheating is a critical consequence of ignoring bad valve guides․ When valve guides wear out, they fail to maintain proper valve alignment and sealing․ This misalignment can disrupt the engine’s cooling system efficiency, leading to increased temperatures․ Over time, excessive heat can damage engine components such as pistons, cylinders, and head gaskets, resulting in costly repairs․ Additionally, poor lubrication from oil leakage can exacerbate friction and heat buildup․ If left unchecked, overheating can cause irreversible damage, potentially leading to complete engine failure․ Regular monitoring of engine temperature and addressing valve guide issues promptly are essential to prevent such severe outcomes․

5․2 Increased Risk of Engine Damage

Ignoring bad valve guides significantly increases the risk of engine damage․ Worn guides allow oil to enter the combustion chamber, leading to oil-fouled spark plugs and potential hydrolock․ This can cause piston damage or cylinder head warping․ Additionally, misaligned valves may collide with pistons, causing cracks or breaks․ Over time, excessive wear can lead to valve seat damage, further complicating repairs․ The engine’s overall performance deteriorates, and without intervention, critical components like the cylinder head or engine block may fail․ Early detection and repair of valve guide issues are vital to prevent such severe and costly engine damage․

5․3 Reduced Fuel Efficiency

Bad valve guides often lead to reduced fuel efficiency due to oil entering the combustion chamber, which disrupts the air-fuel mixture․ This results in incomplete combustion, lowering mileage per gallon․ Misfires caused by worn guides further decrease efficiency, as the engine consumes more fuel to compensate for poor performance․ Additionally, increased oil consumption from leaking guides adds to operational costs․ Over time, this inefficiency strains the engine, making it work harder and consume more fuel․ Addressing valve guide issues early is essential to restore fuel efficiency and minimize long-term financial and mechanical impacts․

Repair and Maintenance Tips

Replace worn valve guides promptly to prevent further damage․ Regular engine maintenance, including lubrication and inspections, helps avoid issues․ Address related problems early for optimal performance and longevity․

6․1 Replacing Worn Valve Guides

Replacing worn valve guides is critical to restore engine performance․ This involves removing the old guides, reaming the housing, and installing new ones․ Proper alignment and fit are essential to prevent future issues․ Lubrication during installation ensures smooth operation․ Regular maintenance after replacement helps prolong engine life and efficiency․ Addressing related problems early prevents further damage․ Professional assistance is recommended for precise installation and optimal results․ Timely replacement avoids costly repairs and maintains engine health․

6․2 Regular Engine Maintenance

Regular engine maintenance is vital for preventing valve guide issues․ Oil changes, filter replacements, and inspections ensure cleanliness and lubrication․ Addressing carbon buildup and wear early can prevent valve guide failure․ Monitoring oil consumption and exhaust smoke helps identify potential problems․ Proper maintenance schedules and tune-ups optimize engine performance and longevity․ Regular checks of valve train components and lubrication systems are essential for early detection of issues․ Consistent care reduces the risk of severe damage, ensuring reliable engine operation and avoiding costly repairs․ Prioritizing maintenance supports overall engine health and efficiency, maintaining your vehicle’s longevity and performance․

6․3 Addressing Related Issues

Addressing related issues ensures comprehensive engine health․ Fixing leaks, worn piston rings, and faulty PCV systems prevents oil contamination․ Replacing damaged seals and guides stops oil from entering combustion chambers․ Inspecting valve trains and adjusting clearances restores proper engine function․ Correcting ignition and fuel system problems prevents misfires and poor performance․ Ensuring proper lubrication and cooling system efficiency supports overall engine operation․ Resolving related issues prevents cascading damage, minimizing repair costs․ Timely fixes enhance fuel efficiency and reduce emissions․ A holistic approach to engine maintenance guarantees long-term reliability and optimal performance, safeguarding against future complications and extending engine life․ Early intervention is key to avoiding catastrophic failures․